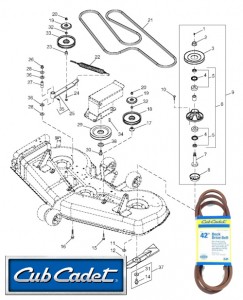
 Changing the belt on your Cub Cadet riding mower is relatively easy, if you follow the instructions carefully and take a few basic precautionary measures. It should only take about 30 minutes, but if this is your first belt change on a riding mower, allow yourself more time.
Before beginning, gather needed tools, including:
- a 3/8” drive ratchet
- a basic socket wrench set
- a basic wrench set
- a factory approved, new belt
- flat and Philips head screwdrivers
- work gloves
- 2 wooden blocks
- Belt routing diagram
Park the mower on a level surface, put the parking brake on and then put the PTO/Blade Engage Knob into the OFF position. Take the ignition key out and remove the spark plug to prevent any accidental starting while you work. Check your manual to familiarize yourself with all parts before taking the mower deck off.
Place the deck lever in the highest position and put the wooden blocks under the edges of the deck, to support it. Lower the deck all the way and then locate the J-hooks that attach the deck to either side of the deck lift arm. Pull each of these out and then take out the wood blocks. Next, pull the click pin from the deck hanger rod in the front.
Next, take off the belt keeper rod that is around the engine pulley so you can get to the belt. Take the belt off of the engine pulley, and then put the deck height lever into the highest position. Turn the front wheels of the mower all the way to the left and slide the mowing deck out from under the right side. Clear away any grass clippings and debris and observe the routing position of the belt.
If you do not have a belt routing diagram, sketch the route on a note card or take a photo in case you forget how to route the belt later. Now put on your work gloves to begin removing the belt from the pulleys. The idler spring can give you a nasty pinch if you are not wearing gloves.
Removing the belt from around the left-hand spindle pulley is first. For 42 and 46 inch decks, set the 3/8” drive ratchet wrench to loosen and insert it into the square hole you see on the idler bracket. For a 42 inch deck, turn the handle of the ratchet toward the front of the mower. Do not allow the ratchet handle to move towards the back of the mower before you take it out of the square hole. For a 46 inch deck, turn the ratchet handle towards the right side of the mower. Once the tension on the belt is relieved, you can remove it. On a 50 inch mower deck, you will see a bolt that fastens the pivoting idler pulley to its bracket. Loosen this bolt but do not remove it. This will make it easier to complete later belt-removal steps. Then you then will use the 3/8” drive ratchet set to tighten, inserted into the square hole on the left side of the idler bracket. Make sure you refer to your Cub Cadet Owner’s manual for the proper torque specifications. Turn the handle toward the right side of the mower to loosen the belt so you can remove it. Now you can take the belt off of the rest of the pulleys.
Referring to the belt routing diagram, your sketch or photo, now place the new belt on the mower deck correctly. Now use the 3/8” drive ratchet set to the correct setting (opposite the one you just used to loosen the tension on the belt,) to tighten the tension on the belt. Ensure that the bolt fastening the pivoting idler pulley to its bracket is tightened. Now return the belt covers to their proper places and tighten their fasteners. You are ready to put the cutting deck back onto the mower.
Slide the mower deck back into position under the mower. Lower the deck and place the belt around the engine pulley, and then fasten the belt keeper rod back into place. Put the click pin back into the deck hanger rod in the front and then put the J-hooks securely back onto the deck lift arm. Lift the deck to the highest position and you are almost done.
Put the spark plug back in or re-connect the spark plug wires. Turn the mower on, put the PTO/Blade Engage Knob into the on position, and then listen for any unusual noises. Turn the tractor back off and put the PTO/Blade Engage Knob back into the off position. Remove the spark plug once again, lower the cutting deck and examine the belt to ensure that it is correctly routed and tightened. Once you are confident that all is well, put your spark plug back in and you are ready to go.
To purchase genuine Cub Cadet parts online, make sure you only shop at www.CubParts.com.
