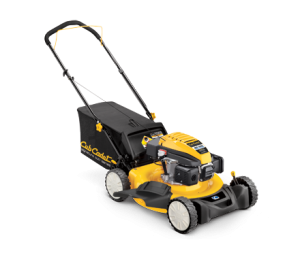
 Through the spring and summer months, homeowners will need to engage in quite a bit of ongoing mower maintenance so that their task is as easy and efficient as possible. One of the most important procedures is simply replacing the mower’s included air filter after many hours of use. Though it might sound complicated to those who are new to Cub Cadet push mowers and other equipment, the company has worked hard to make sure that this crucial maintenance requirement is as easy to undertake as possible. There are a few basic steps, and some important safety considerations, that will ensure air filter replacement takes on a few moments of time before giving the lawn its regular trim.
Keep Safety in Mind While Changing the Mower’s Air Filter
It’s a good idea to change the mower’s air filter prior to mowing the lawn, rather than immediately afterward. Changing this key piece of equipment before mowing ensures that the engine isn’t hot, that burns aren’t a risk, and that fuel isn’t likely to accidentally ignite due to localized heat. The mower should have any fuel valves turned off and any spark plugs disconnected, to further prevent against engine ignition or unwanted heat. Maintenance of this type should be conducted on a flat and level surface, with excellent local ventilation. Make sure there aren’t any non-essential bystanders near the mower during maintenance to reduce the risk of injury to others.
Why Bother with an Air Filter Change on Cub Cadet Mowers?
The air filter is often overlooked by today’s equipment owners, since it sits out of the way on most Cub Cadet mowers and is hard to notice throughout the summer. Despite its relative lack of visibility, however, the air filter is absolutely crucial when ensuring great fuel efficiency, easy engine ignition, and professional mowing results throughout the warmest months of the year.
The filter keeps dirt and debris away from the fuel and the engine, and makes sure that the equipment doesn’t require more serious maintenance due to dust buildup inside the engine. If this part is not replaced as recommended by the user manual, the engine will be harder to start and fuel efficiency will suffer. More frequent refueling will result, and operators may find themselves needing professional service to restore the engine’s pristine condition.
Follow a Step-by-Step Approach for Easier Air Filter Replacement
Replacing the mower’s air filter is one of the easier processes recommended by the maintenance schedule. Follow a few basic steps to safely remove the filter and replace it with an OEM option made by Cub Cadet.
1. Following the safety procedures mentioned earlier, prepare the mower for safe and effective maintenance during the air filter replacement process. This means switching any included fuel valve into the “off” position and disconnecting the spark plug wire to prevent unwanted engine starts. Remember that the mower’s engine should be warm at most, but preferably cold and unused immediately prior to air filter replacement.
2. Locate the air cleaner body on the mower, and then lift on the latches to expose the air filter holster.
3. Remove the air filter from the Cub Cadet mower. If the mower was recently used or if the filter is particularly encrusted with dirt and debris, use a pair of gloves to ensure safety and cleanliness during the procedure.
4. Locate the new, OEM Cub Cadet air filter and slide it into the appropriate assembly on the mower. Make sure that the filter is inserted properly, is flat and snug against the air filter assembly, and allows the casing to close appropriately.
5. Replace the air cleaner lid, which is designed to slide into the air filter assembly. A bolt is used to secure the lid into place, so be sure that this part has been sufficiently tightened before proceeding to the final step in the air filter replacement process.
6. Prepare the mower for resumed productivity. This means switching any included fuel valve back to its “on” position and reconnecting the spark plug wire so that the engine can be properly started with the included starter grip. Give the mower a quick test start, largely to make sure that the air filter is properly installed and that air can reach the engine during ignition.
CubParts.com Has the OEM Air Filter Replacements that Operators Need
When the time comes to replace the Cub Cadet mower’s air filter, only OEM parts will suffice. OEM parts are made in Cub Cadet’s factories, right alongside its more traditional power equipment offerings. This ensures the quality of the air filter and means that it will be perfectly compatible with the model for which it is rated. CubParts.com offers an online parts lookup tool that narrows parts down by their part number, the engine manufacturer, and the mower model number, making it easy to find a high-quality part that fits perfectly into any Cub Cadet model.
