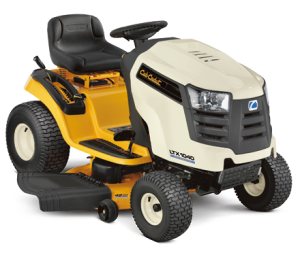
 The Cub Cadet LTX1040 riding mower is extremely easy to maintain throughout the year, with easy oil changes and efficient adjustments of all key parts. From time to time, however, maintaining the LTX1040 requires a bit more effort. When problems affect the cutting deck, the deck belt, or the mower’s blades, equipment owners will have to disassemble each component and either repair or replace parts that are key to accurate cutting and efficient engine operation. Though more involved, each of these processes can be completed in just a few simple, straightforward steps.
Removing and Inspecting the Cutting Deck
Maintaining the cutting deck can often be done without removing the assembly, but it sometimes becomes necessary to remove the deck in order to replace belts or other parts, as well as to more thoroughly clean clogs, residue, or debris away from the deck and blades. Here’s how to remove the deck in a few simple steps.
Step 1: Ensure Safety
Disengaging the PTO knob and make sure the parking brake is fully engaged. Then lower the deck all the way by using the deck lift lever.
Step 2: Remove the Guard Belt
Remove the mower’s guard belt by removing the hex screws that keep it in place. Pull the belt keeper down and toward the right, and then pull the deck belt away from the engine pulley.
Step 3: Remove the Mower Deck
Next, remove the deck engage bolts from both the left and right sides, then release the deck engage cable as well as the cotter pin. The deck will be loose, so gently remove it and guide it away from the equipment. The deck is now ready to be cleaned, replaced, repaired, or otherwise worked on.
Working with the Deck Belt
To get started with removing the deck belt, the mower deck itself must have already been removed. Be sure to follow the steps above to complete the removal of the deck before continuing. When the deck has been successfully removed, follow a few simple steps to completely remove the deck belt.
Step 1: Get the Belt Ready for Removal
Remove the deck belt covers by simply loosening and removing the hex nuts that keep it in place. If the belt covers won’t come off easily, try removing the hex nut fastened to the idler pulley.
Step 2: Remove the Belt
Carefully loosen and remove the belt from around the two idler pulleys and the two spindle pulleys.
Step 3: Replace the Belt
Simply thread the new deck belt by winding it through the two outermost spindle pulleys. This process should be taken slowly, as rushing through deck belt replacement can sometimes cause the belt to become damaged, torn or punctured. When the belt is fully in place, be sure to replace the belt covers and secure all hex nuts and screws into place.
Removing and Replacing the LTX1040 Mower Blades
Before getting started with the removal of the Cub Cadet mower’s blades, it’s absolutely essential for equipment owners to wear proper gloves to protect against cuts and scrapes. In addition to being sharp, these blades are often quite dirty and sometimes rusty. Without proper protection, that means mower blades can cause not only cuts, but also infections and other serious medical problems if proper gloves are not worn.
Step 1: Remove the Mower Deck
As with the deck belt replacement process, any work done to the mower’s blades can only be done after the mower deck is fully removed from the bottom of the mower. Proceed through that process before continuing.
Step 2: Stabilize the Existing Blades
Use a block of wood within the mower deck to prevent the existing blades from turning and moving during removal. This will reduce the risk of injury and make the entire process easier to finish in a quick fashion.
Step 3: Remove the Blades
To free the blades from the mower’s deck assembly, simply loosen the hex flange that keeps the entire blade mechanism secured to the mower. The blades can then be lifted up, sharpened, cleaned, or replaced if there is significant damage done to the blade shape or cutting edge.
Step 4: Replace the Blades
Reattach the blades using the hex flange and then secure the mower deck to the Cub Cadet LTX1040 body. When everything is tight and in place, mowing will be better and more accurate overall.
For Parts and More Information Abut the LTX1040, Visit CubParts.com
The cutting deck, belts, and blades are among the most important parts of any mower. When any of these components requires service or replacement, CubParts.com can help equipment owners get the job done. The site is full of OEM Cub Cadet replacement parts, including pulleys, belts, and more. Additionally, it’s easy to find operator’s manuals and plenty of other documentation that can help with maintenance. For a long-lasting mower, CubParts.com is a natural destination.
