Using TruEdge for Better Golf Courses

truedge-slide-11

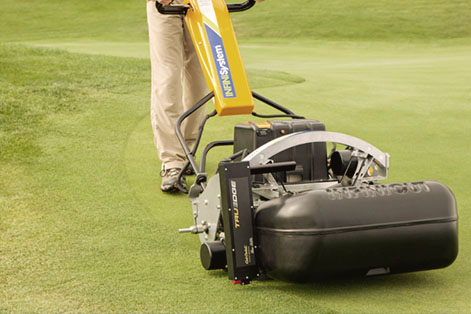
We may not have self-driving cars yet, but we’re starting to see related technologies like lane departure warning systems and variable cruise control. Likewise, we’re seeing similar technology in mowers that point the way to automated landscaping. Cub Cadet’s TruEdge system uses advanced sensor technology to help golf course landscapers maintain greens while reducing overall maintenance, pointing the way toward better residential mowers.

Golf Courses: The Cutting Edge of Mowing Technology

When it comes to turf, golf courses are at a level far beyond normal landscaping. Not only do these green spaces need to be beautiful, they need to adhere to the original design for consistent play. A minor nuisance like a few weeds or a bald patch can keep golfers from playing their game as intended, and the smallest variations in grass height and density can alter game play. If the course is used for a professional game, the green should be at its best so that the only thing determining the final score is the players’ abilities.

Therein lies the problem: with such intensive maintenance, it’s easy for the shape of course features to change over time as landscapers make slight alterations to their mowing patterns. This phenomenon, known as “greens creep,” can cause the edges of greens and tees to move at a rate of one to four inches per month, requiring remarking, removing and eventually reshaping of the green’s edge. That’s where the TruEdge system comes in.

TruEdge

When Cub Cadet opened their Golf and Sports Turf division a couple years ago, they purchased several small specialty equipment makers to create a complete lawn care system. By combining these companies’ groundbreaking lawn care techniques with Cub Cadet’s own research and extensive resources, they’ve leapfrogged ahead of other manufacturers when it comes to cutting edge landscaping.

The TruEdge system originated with Precise Path Robotics, the same company behind the tracking system of the RG3 turf mower. TruEdge uses a metal wire buried in the soil for guidance, similar to current residential automated mowers. However, while residential systems can only use a wire buried near the surface, this professional system can sense the wire when buried at a depth of 10-12 inches. This greatly reduces the chance of damage, letting the operator mow over the exact same area over several years. To make the line visible to the system’s sensor at that depth, a quick coupling transmitter is attached to the line to energize it when it’s time to mow.

Installation starts by marking off the correct placement of the green on the course. The area is edged to create a visible border, then a standard cable trencher is used to lay down the sensor wire across this border. Overall, this is no more intensive than a single greens correction.

The TruEdge detector can attach to any turf mower regardless of brand or size, so operators can gain the benefits of this system without having to buy all new equipment. It uses a sensor that is lined up with the outer edge of the reel and a multicolor display that can be mounted within easy view of the operator.

Reading the display is simple: the display has two arrows and a center line. LEDs light up across the display to show the mower’s position relative to the wire. Once the operator has the mower lined up correctly, a row of blue LEDs light up over the center line. This lets even inexperienced operators mow against the same edge time after time to maintain the course and eliminate the need for corrective landscaping.

The Future

For course operators, the TruEdge system is a bargain thanks to the amount of work it saves. While this system with its bulky, high sensitivity sensor may be out of reach of regular buyers for some time, it points the way to major improvements in landscaping automation.

The depth of the wire places it in an area that is below the frost line in most areas, and the only activity likely to interrupt the path of the wire is from digging post holes or doing utility work. It also doesn’t require special equipment to installation, and the sensor is accurate enough to all but eliminate trimming around walls and other obstacles.

Getting Parts for Your Cub Cadet

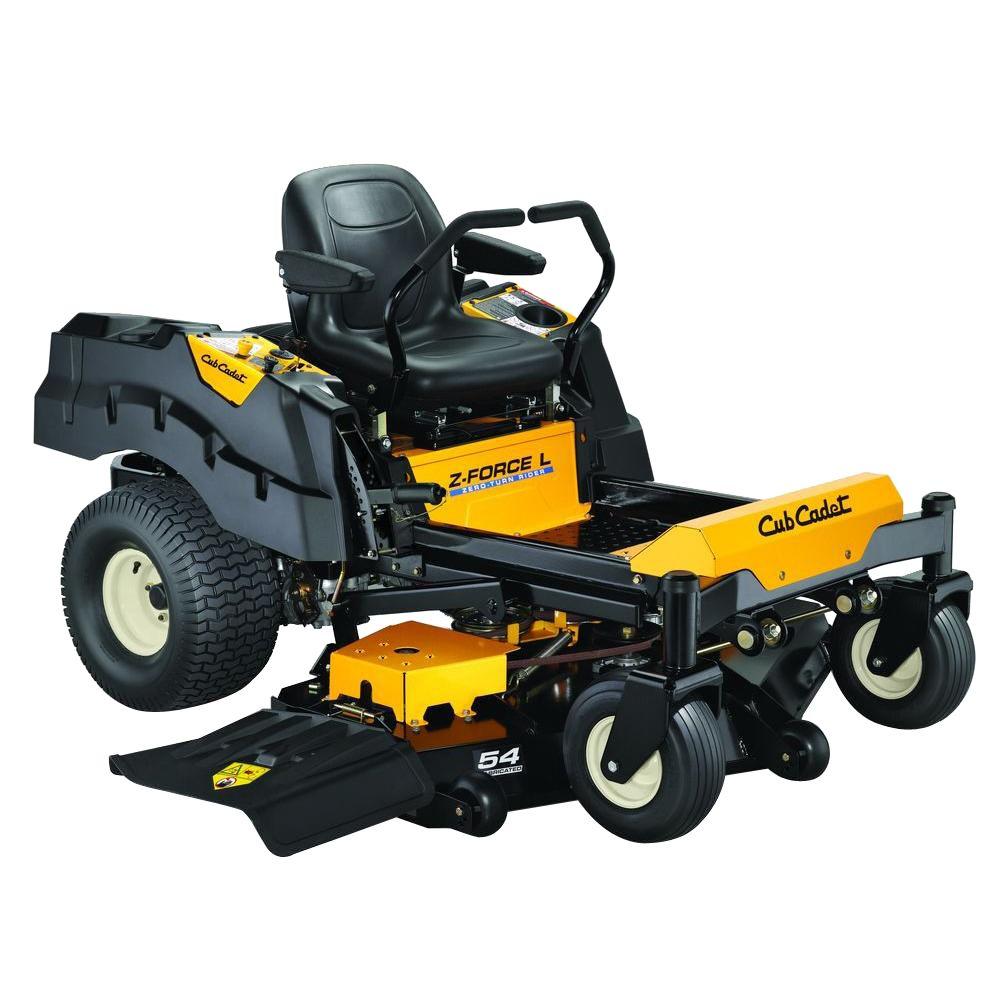
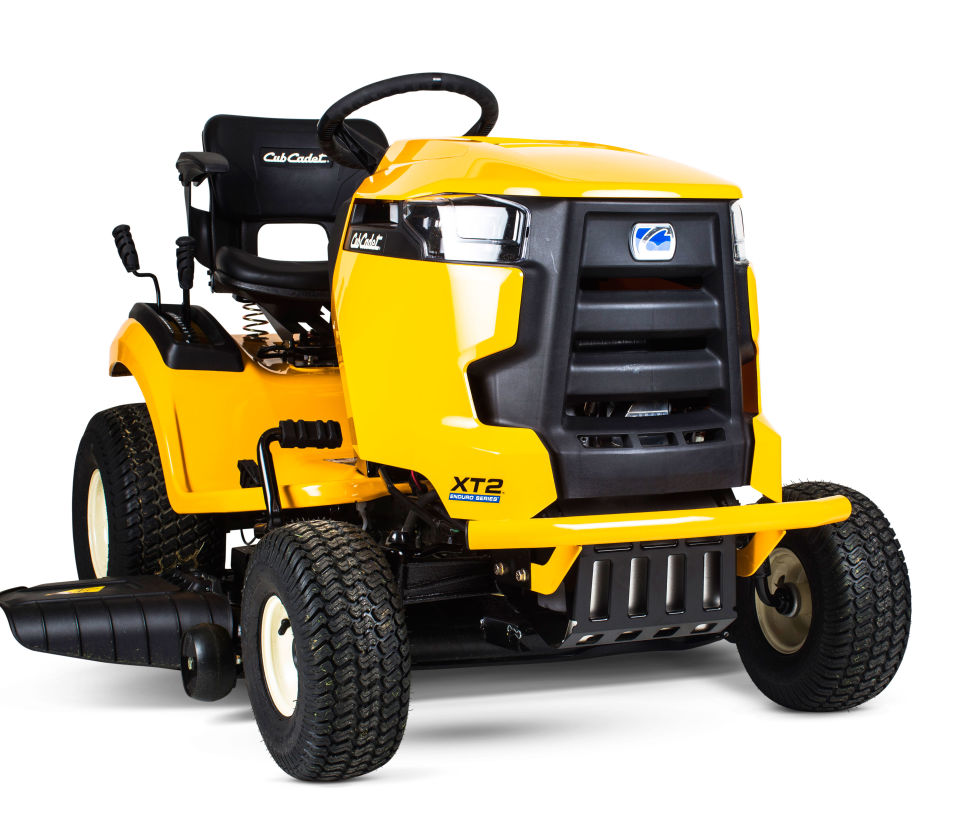
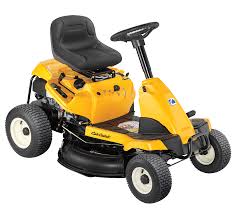
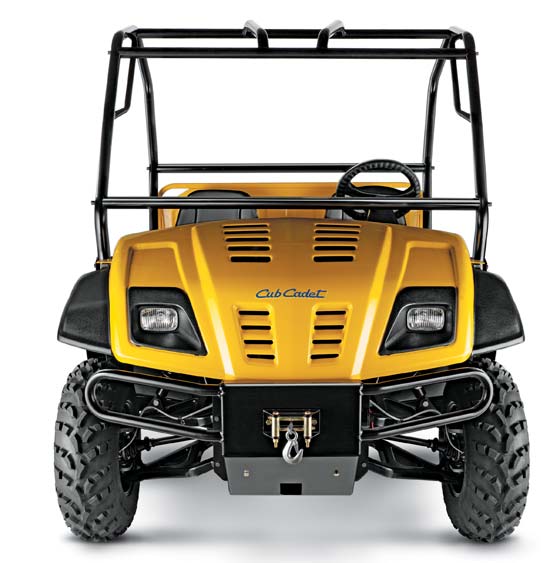
You might not be able to get a TruEdge for your mower, but you can still get everything else for your Cub Cadet equipment at Cubparts.com. We’re a certified dealer for Cub Cadet and their manufacturing partners, so we’re able to carry parts for everything from the smallest string trimmer to the biggest commercial ZTR. Best of all, we can ship your order to any address in the U.S. and Canada.

Posted in Uncategorized | Tagged , , | Leave a comment

Leveling the Deck On Your Cub Cadet

ffa70036-6667-4ef9-8742-c02887972286_1000

Is your mower leaving a sloped or wavy cutting finish? There’s a good chance the deck is out of alignment. Here’s what you need to do to get your Cub Cadet’s deck in the correct position, whether you have a riding mower or a ZTR.

Symptoms of a Misaligned Deck

There are three ways that a misaligned deck can result in a poor cutting finish:

– If the finish is wavy or has smooth troughs, the deck is probably misaligned front to rear.

– If the grass slopes in one direction at a width about equal to the deck, the deck is probably misaligned side to side.

– If the deck is scalping the grass even though the mowing height should be high enough to stay off the ground, the deck may be misaligned.

Keep in mind that tire pressure can also affect the angle of the deck. This should be checked first before adjusting the deck position.

Before You Begin

The mower should be on a flat surface, and the parking brake should be engaged. Parking it on a paved surface like a driveway will make it easier to take measurements. Remove the key from the ignition to prevent an accidental start. Always wear thick gloves when handling mower blades to prevent cuts.

Adjusting the Deck Height Front to Rear

1. Using the height adjustment lever, set the deck height somewhere in the middle.
2. Turn the blade next to the discharge chute until the ends are pointed toward the front and rear of the mower.
3. Measure the distance from the blade tips to the ground. On riding mowers, the front of the blade should be between ¼ to 3/8 of an inch lower than the rear of the blade. On ZTRs, the front should be ¼ to ½ an inch lower than the rear.

To change the height on riding mowers, turn the lock nut on the end of the front deck hanger rod to change the height. Some models have a jam nut that needs to be loosened before the lock nut will move. Once the deck is level, retighten the jam nut.

To change the height on ZTRs, loosen or tighten the jam nuts on the stabilizer bracket, located on the front face of the deck.

Adjusting the Deck Height Side to Side

1. Turn the blade next to the discharge chute until the ends are pointed to the sides of the mower.
2. Measure the height between the rightmost blade tip and the ground on the blade on the right side of the deck as well as the height between the left tip of the left most blade on the deck and the ground. If the deck is level, both measurements should be equal.

To adjust the deck on XT Enduro Series mowers, turn the adjustment nuts found on the rods underneath the rear fenders. There is a jam nut over each adjustment nut that needs to be loosened to allow adjustment, then tightened once the deck is level.

To adjust the deck on a ZTR, loosen the ½ inch bolt on the left side adjustment gear, located below the deck hanger rod. Turn the ¾ inch nut that goes over the bolt to raise or lower the deck. Tighten the bolt once the deck is level.

To adjust the deck on all other Cub Cadet riding mowers, loosen the bolt on the adjustment gear, taking care not to remove it completely. This bolt and gear can be found on the left deck hanger. Turn the gear to adjust the height, then once the blade measurements match, tighten down the bolt.

Getting Parts for Your Cub Cadet Mower

Find a bent hanger or notice your blades are due for a replacement? Cubparts.com carries everything you need to fix your mower. Our site integrates factory parts diagrams and descriptions into our search engine so you can quickly find the part you need, and we can ship that part to any address in the U.S. or Canada.

Posted in Uncategorized | Tagged , , | Leave a comment

Replacing a Belt on Your Cub Cadet Lawn Tractor

Cub Cadet XT3 GS

Belts are easy to forget about, but as the season wears on, it becomes more likely that a stretched or broken belt will keep your mower’s deck from working. Here’s what you need to know to replace the belts on your Cub Cadet, whether you have a wide-area walk-behind, a riding mower or a ZTR.

Safety

While it may be possible to change a belt without separating the deck from the mower, it’s not worth saving a couple minutes on a belt replacement if it means the risk of having the mower fall on you. Cub Cadet designs their decks to be easy to remove, so there’s no reason to tilt a riding mower or ZTR to access the belt.

It’s easy to accidentally touch the engine or muffler when working around the engine pulley, so it’s a good idea to let the mower cool for at least a half hour before replacing the belt. Before you start working on the mower, unhook the wires from the spark plugs to prevent an accidental start.

Removing the Deck on a Riding Mower

1.Move the deck height lever to the lowest position.
2. There are J hooks on the left and right sides of the deck that need to be separated from the mower. To do this, simply pull them outward.
3. Move the deck height lever to the highest position.
4. Remove the cotter pin from the stabilizer rod and slide the bar out of the hanger bracket.
5. Remove the screw holding the belt keeper around the engine pulley. Remove the keeper.
6. Slide the belt off of the PTO pulley.
7. Remove the bow tie clip and release the PTO cable from the hanger bracket. Remove the tension spring from the idler arm.
8. Turn the front wheels to left. You should be able to slide the deck out from the right side of the mower.

Changing a Riding Mower Deck Belt

After the deck has been removed from the mower, do the following:

1. Remove the belt cover from the outer pulleys.
2. Unhook the idler spring, then unscrew the nut and bolt that hold the idler pulley to the belt keeper.
3. Turn the square hole in the right idler bracket with a 3/8 drive ratchet to separate the pulleys. Remove the left pulley.
4. Replace the belt.
5. Follow the previous steps in reverse order to reassemble the deck.

Removing the Deck from a ZTR

1. Remove the mower deck belt-keeper rod. Slide the deck belt off of the engine pulley.
2. Set the deck to the highest cutting position. Slide a set of wood blocks underneath the deck, then set the mower deck to the lowest height to let it rest on these blocks.
3. Slide out the J-hooks on the left and right sides of the deck to release it. Slide out the blocks, then take the pin out of the front deck hanger rod.
4. Turn the front wheels to left. You should be able to slide the deck out from the right side of the mower.

Changing the Deck Belt on a ZTR

Once the deck has been separated from the mower, do the following:
1. Using a ratchet, remove the deck belt covers and the nuts and bolts that hold the idler pulley to the belt keeper.
2. Pull off the left idler pulley and remove the old belt. Loop the new mower deck belt around both pulleys.
3. Reassemble the mower by following the previous instructions in reverse order.

Changing the Belt on a Wide Area Walk-Behind Mower

1. Tip the mower so that the engine air filter is facing up.
2. Use Cub Cadet’s Universal Blade Removal Tool to take off the mower blade.
3. Remove the screws that secure the engine baffle and drive belt cover to the deck. Remove the baffle and cover.
4. Remove the belt from the blade adapter and drive pulley, then slide the adapter off of the crankshaft.
5. Starting at the rear of the mower, slide the belt off of the transmission pulley.
6. Push the deck baffle aside and slide the belt off of the engine pulley.
7. Slide the new belt in between the deck and the baffle. Wrap the belt around the transmission pulley and then the engine pulley.
8. Reassemble the mower following steps 1-6 in reverse order. When installing the blade, tighten the blade bolt to the torque specified in the owner’s manual.

Where to Get a New Belt for Your Cub Cadet

www.cubparts.com is a certified dealer for Cub Cadet, so we carry OEM belts that will fit your mower correctly and provide factory reliability. Our site’s search engine lets you quickly identify the right part thanks to built-in factory diagrams and descriptions. We ship across the U.S. and Canada.

Posted in Uncategorized | Tagged , , | Leave a comment

Fueling Your Cub Cadet

Fueling Your Cub Cadet

Most problems with small engines can be traced to fuel. What kind of fuel should you be using in your Cub Cadet, and how should you be using it to ensure your equipment works reliably?

Which Type of Gasoline is Best?

Ethanol can cause problems because it’s hygroscopic: over time, it absorbs water and will separate from the gasoline it’s mixed with, causing problems with starting and ignition. This isn’t a problem in cars since the fuel is usually burned shortly after purchase, but fuel can sit in outdoor power equipment for months.

Unfortunately, some owners have taken this to mean that fuel problems can be eliminated by switching to ethanol-free fuel. This just causes another problem: without the solvent properties of ethanol, modern gasoline quickly forms gums that varnish fuel components and make the fuel harder to burn. This also causes problems with starting and ignition.

All engines used in recent Cub Cadets regardless of manufacturer are designed to run just fine on ethanol blends up to 10%. When it comes to fueling your equipment, the most important factors are freshness, which is affected by both when the fuel was purchased and whether it has been treated with a stabilizer. The effect of these factors depends on the engine you’re using.

Two Stroke Engines

A two-stroke engine uses the crank to push air and fuel in and move exhaust gases out, which means it can’t keep oil in the crankcase like a four stroke engine. Instead, they depend on oil mixed with the fuel for lubrication.

Modern Cub Cadet two strokes like the 27cc motor found in some of their current string trimmers need oil mixed with the fuel at a 50:1 ratio. That means 2.6 ounces of oil needs to be mixed with every gallon of gasoline, or 20 ml for every liter. Older engines may need a 40:1 ratio, which is 3.2 oz/gallon or 25 ml/liter, or 32:1, which is 4 oz/gallon or 31.25 ml/liter. It’s important to get exactly the right ratio: if there’s too little oil, the engine won’t be protected from friction wear, and if there’s too much oil, the fuel mixture will be lean, leading to high combustion temperatures and overheating.

Two stroke engines are the most sensitive to stale fuel. Gasoline should always be mixed with a stabilizer, and it should be used within one month of purchase. For this reason, the amount of oil mixed fuel you keep on hand should be minimal, and any leftover fuel should be run through the engine before storing it for the off-season.

Four Stroke Engine with Carburetors

Whether the motor was made by Cub Cadet, Kawasaki, Kohler, Honda or Briggs & Stratton, the fuel recommendations remain the same: untreated fuel can be used for up to a month after purchase, while treated fuel can be used for up to three months.

When it’s time to store your equipment, the motor should be run for a few minutes with treated fuel, then the fuel system should be drained. This keeps old gas from lacquering inside the fuel system, and any fuel left over is less likely to cause problems.

Fuel Injected Engines

A fuel injector sprays a fine mist of fuel into the intake, helping it atomize and mix with the air. This not only improves fuel economy and performance compared to carburetor-fed engines, it also works better with less volatile fuels.

Kohler’s Aegis V-Twin, found in some Cub Cadet UTVs, needs its fuel to be treated just like a carburetor-equipped engine, with straight gasoline used within a month of purchase or treated fuel within three months of purchase. However, the fuel system doesn’t need to be drained before storage if the fuel inside is stabilized.

Cub Cadet’s fuel injected engines can run on straight fuel, only requiring stabilizer when being put into storage. These engines can also run on gasoline blended with up to 20% ethanol so they can be used with E15.

Getting Rid of Old Fuel

Regular gasoline can be poured into your car’s gas tank. Since it’s fuel injected and the stale fuel it gets will be mixed with a large quantity of fresh fuel, the engine should have no problem burning it.

If you have leftover fuel mixed with two stroke oil, contact your local recycling center to find out where it can be disposed: pouring this fuel into your car’s fuel tank could damage oxygen sensors and other sensitive components.

Repairing Your Cub Cadet’s Fuel System

Have a cracked fuel line or dried out seals around the carburetor? You can get everything you need to fix your Cub Cadet at www.cubparts.com. Our site has built in parts diagrams and descriptions to help you find what you need, and you can have your order shipped to any address in the U.S. and Canada.

Posted in Uncategorized | Tagged , , | Leave a comment

Cub Cadet CC 30 Rider

Cub Cadet CC 30 Rider

Cub Cadet’s CC 30 Rider is the best selling rear engine riding mower on the market, and it’s easy to see why when Consumer Report has praised it for its excellent clipping dispersal, clump-free mulching and general ease of use. What makes this tiny riding mower such a great choice for small lawns?

Operating Simplicity

Whether you’re new to riding mowers or you can operate a lap bar ZTR like a pro, there’s a lot to like about the CC 30’s design. The overall layout is similar to a mid-deck ZTR with the operator sitting directly above the deck, letting them get a clear view of obstacles before they reach the blade.

Although it does have a turning radius like a lawn tractor, the controls are identical to the Synchro-Steer system Cub Cadet uses in their professional mowers. The direction is controlled by a steering wheel, while a pair of pedals let the operator go forward or reverse while offering fine adjustment to get just the right speed. This makes it far easier to control than a standard riding mower.

Other smaller features help make the mower simple and comfortable to use. The steering column telescopes and the fuel level can be checked by looking straight down at a slot in the frame that exposes the translucent gas tank. The CC 30 is about the same size as a walk-behind mower, so it’s easy to store.

Performance

This mower is built for one purpose: cut one acre of suburban lawn. That means an emphasis on maneuverability and cut quality.

This starts with a 14 gauge steel stamped deck that provides Cub Cadet’s characteristic high vacuum for a superior finish. Inside this shell, there’s a single 30-inch blade riding on a spindle supported by ball bearings. This deck can be set to one of 5 cutting heights ranging from 1.5-4 inches, and it has the same Smartjet deck washing system found on other Cub Cadet mowers, making cleaning as simple as hooking up a hose.

The CC 30 is powered by Cub Cadet’s single cylinder 382 cc engine. While it may be small, it still has a full pressure oil system with an automotive-style filter to give it the same wear protection as a commercial motor. Likewise, the company went with a hydrostatic transmission from Hydro-Gear, a company that supplies equipment for a wide range of commercial mowers. The T2HP unit used in the CC 30 is designed to be maintenance free and has a built-in cooling fan. Together, the motor and transmission propel the mower to a top speed of 4.25 mph when going forward and 4.35 mph in reverse.

Warranty

Whether you choose the base CC 30 or go with the LED headlight-equipped CC 30 H, Cub Cadet will guarantee the mower for three years or 120 hours of residential use.

Parts

When you need to service the CC 30, visit www.cubparts.com. We’re a certified Cub Cadet dealer, so we carry everything you need for your mower from blades to belts. Our site has factory diagrams built into its search engine, making it easy to identify the part you need. We have a massive parts stock for fast shipping, and we can have your order delivered anywhere in the U.S. and Canada.

Posted in Uncategorized | Tagged , , | Leave a comment

How Can a Volunteer UTV Help My Landscaping Business?

How Can a Volunteer UTV Help My Landscaping Business

Cub Cadet makes all kinds of equipment for lawn care professionals from top quality ZTRs to the state-of-the-art RG3 robotic golf course mower. In amongst these lawn-specific devices are two of their Volunteer UTVs. What does a vehicle usually used for driving around in the woods have to do with landscaping and groundskeeping? Thanks to the way Cub Cadet builds and outfits these vehicles, they can be just as useful taking care of a manicured lawn as they are fun to drive around in the wilderness.

Models

Cub Cadet makes two versions of the Volunteer specifically for professional use: the 4×4 EFI and the WT Cab. Both have the same basic construction, but the WT Cab includes a cab, lights, side mirrors and other accessories that are optional on the 4×4 EFI. It also has a cargo area with sides that can be folded down to be converted into a flatbed, while the 4×4 EFI has a standard UTV dump bed.

Power

Both the Volunteer EFI and WT are powered by a 747cc Kohler Aegis V-Twin. This advanced engine is fuel injected for easy starts in any weather and liquid cooled to handle the most severe heat. These features also increase engine life and reduce maintenance requirements.

Payload and Towing

The WT Cab can carry up to 1,200 lbs, while the Volunteer EFI has a payload capacity of 1,400 lbs. When it comes to towing, the WT Cab pulls ahead, being able to handle up to 1,700 lbs. to the EFI’s 1,400. This lets these vehicles haul anything from bags of fertilizer to generators and tools to the work site.

Both side-by-sides have a Class 1 two inch receiver hitch. That means they can pull overseeders, aerators and other gear that doesn’t require a PTO so your mowers and tractors can be free for other work. If you just want to haul more stuff, Cub Cadet makes a trailer with a 12.5 cubic foot capacity.

Traction

A low center of gravity keeps the vehicle stable while making it easy to get in and out of. The Volunteer’s design provides 11 inches of ground clearance, yet there are just 12 inches from the ground to the cab floor.

Working in an area with difficult terrain? The Hilliard traction system provides true four wheel drive and the rear axle can be locked for extra grip. It can also ford up to 22 inches of water, but that’s probably not a feature you’ll put to the test very often.

Attachments

Just like a tractor, this UTV’s true abilities come into play when you start adding equipment. Cub Cadet makes 40 attachments that let you outfit these vehicles to best fit your needs:

The WT comes with a cab, but you can also add one to the regular Volunteer, as well as outfit both side-by sides with full-size doors. There’s also a heater available that taps into the engine’s coolant supply.

Install a speedometer, backup alarm, turn signals and brake lights to meet your workplace safety requirements or to get the UTV qualified as a Low-Speed Vehicle (LSV) so it can be driven on the street.

Add a light bar to illuminate your work area, or use the wiring kit to add all the powered accessories and lighting you want.

Need to drag out large branches and other awkward objects? Install a 4,000 lb. Warn winch. Use the dump bed constantly? Install an electric lift for easier unloading. Need to move that dirt around once it has been dropped off? A 72-inch dozer blade can be attached to the front.

Sourcing Parts and Accessories

Getting parts and accessories for these vehicles is easy: just visit www.cubparts.com. As a certified dealer for Cub Cadet and Kohler, we can provide you with everything you need for your professional UTV. Our search engine has built-in factory diagrams to make it easy to identify parts, and we can ship them anywhere in the U.S. and Canada.

Posted in Uncategorized | Tagged , , , | Leave a comment

Cub Cadet’s New EFI V Twin Engine

EFI_EngineCub Cadet brought EFI engines to the consumer market last year with the introduction of their new XT1 lawn tractors, and now they’re adding a significant boost in power with the XT2 LX42’s new V-twin. This is the first time in the industry that a fuel injected V-twin has been offered in a lawn tractor, bringing significant improvements in efficiency, power, and ease of use compared to its carbureted competitors.

A First for the Industry

Fuel injected small engines have been around for a few years, but their use has been limited to high-end commercial equipment. Cub Cadet spearheaded the introduction of consumer EFI engines last year with a new 547cc single cylinder used in the XT1 LT42 and LT46 FAB, and now they’re expanding their offerings with a bigger engine that competes with the carbureted twins at the heart of the market.

With this new 679cc motor, consumers can finally get a mower with a fuel injected V-twin that doesn’t have a price you’d expect to see on a nice used car. In fact, the XT2 LX42 EFI is the first lawn tractor in the industry to be offered with an EFI V-Twin.

Why EFI?

Carburetors use a needle that dribbles out fuel which is mixed with incoming air using a Venturi to cause a sudden drop in air pressure. Even at the best of times, this isn’t an efficient way to mix fuel, and it can’t be adjusted to deal with different conditions like altitude and temperature changes without swapping out some parts.

With a closed-loop electronic fuel injection system like the one used in this new engine, a sensor tells the computer how much air is passing into the engine. Using this data, it fires an injector which sprays a fine mist of fuel to get the exact ratio of fuel and air needed by the motor. This spraying action is more effective at mixing the fuel for better combustion, and changes to the mixture can be made on the fly to fit operating conditions, helping the motor run in any weather. This fine control and improved mixing offers several benefits:

Fuel consumption is reduced by up to 25% compared to carbureted motors.

Fuel freshness is less of an issue, so there’s no need to worry about adding stabilizers during the mowing season. When the mower is put in storage, the fuel tank doesn’t need to be drained as long as it has been treated with a stabilizer.

This engine was designed from the start to run fuel blends containing up to 20% ethanol, so there’s no reason to go out of your way to buy ethanol-free fuel. It can also run just fine on E15, which is usually less expensive than regular unleaded.

Since the fuel mix is always correct, the engine runs a lot cleaner. This not only reduces emissions, it extends the life of the oil so it needs to be changed less often.

Is this New Engine Safe to Buy?

Cub Cadet did their homework to ensure the teething problems of this design will be minimal. Bench testing was used to simulate wear and tear until the design could regularly last twice as long as a carbureted engine. Pre-production engines were then field tested in locations ranging from Alaska to Arizona to ensure these motors will work in extreme cold and heat using a variety of fuel blends to ensure they’d run well with commonly available pump gas. Add in features like a fully pressured oiling system, and you get an engine that is sure to be every bit as reliable as anything else from Cub Cadet.

Where Can I Get Parts?

Www.cubparts.com is a certified Cub Cadet dealer, so we carry parts for everything the company has built from classic tractors to this new lawn tractor engine. Our site has factory diagrams and descriptions built into the search system, making it easy to find exactly what you’re looking for, and we can ship your order to any address in the U.S. and Canada.

Posted in Uncategorized | Tagged , , | Leave a comment

Edging Tips

25B-552J710_product_detail_zoom

By using the right techniques, edging your lawn creates well-defined boundaries between the turf, the surrounding pavement and landscape features to give your yard a beautiful finish. These tips will help you create well-defined edges on your property using your Cub Cadet string trimmer, edger, or a combination of the two.

Should I Use an Edger or String Trimmer?

Ask ten different lawn care professionals about the best way to edge and you’ll get ten different opinions. Some will only use a string trimmer, others will insist on using an edger, and some use a combination of the two. Each tool has its own advantages and disadvantages.

An edger can cut a deep, even trench into the soil, creating a clean edge that lasts a long time. In most cases, it will only need to be used every third or fourth time the lawn is mowed. On models that can tilt the blade, like the Cub Cadet LE100, it can also be used to get a finished surface around flower beds without resorting to hand edging.

A string trimmer is great for touching up a previously cut edge, and there’s no chance of cutting too far into the soil, guaranteeing a good finish around concrete. However, the line can’t dig that far into the dirt, so it doesn’t take long for grass to pop back up. Some professionals choose to work exclusively with a string trimmer because it means there’s one less piece of equipment they have to deal with, and they’ll already be using the trimmer for cutting around buildings and fence lines

Before and After Edging

Low voltage wire for outdoor lighting and lawn irrigation systems are usually deep enough to be well below the cutting edge of the blades, but underground pet fence can be as little as an inch from the surface, posing a major hazard. Make sure you know whether this wire has been buried and where it’s located before edging to prevent damage to the wire and your equipment.

If you edge the lawn before mowing, the mower can be used to pick up and remove loose dirt and grass clippings to get the best finish.

Edging with a String Trimmer

The trimmer should be held so that the head is perpendicular to the ground and the gas cap is pointing up. The engine is designed to work at any angle, and both the throttle handle and loop handle are designed to be used in this position.

Start by lowering the head toward the ground to create a thin trench. Once the string is cutting through the soil at the desired depth, start walking backward: as you cut, the line will spin down toward the soil, keeping the grass and dirt from being thrown into the air while creating an even cut.

Edging with a Blade Edger

Start by tilting the edger so that the blade is in the air. Engage the clutch and lower the blade into the soil until the front wheels are on the ground.

As the blade spins and cuts through the soil, it will gently pull the edger forward. Let this action do most of the work, pushing the edger forward only when the soil has been cleared from the cut. If the blade rides up over a tough spot, pull the edger back and roll over it again.

If you’re having trouble getting a clean cut next to concrete, lower the cutting height a little. By making the blade bite into more soil, it will track the edge of the pavement better.

Using the blade in the fully upright position provides a clearly defined line around pavement, but making a straight cut around landscaping features and flower beds will leave an unfinished-looking edge. To get a professional finish, go around the border with the blade straight, then make a second pass over the feature or bed with the blade angled out to the edge of the first cut. This will make the soil slope down toward the grass for a more natural look.

Keep Your Equipment Ready to Edge

When you need to service or repair your Cub Cadet, visit www.cubparts.com. We’re a certified dealer with a wide range of OEM parts in stock ready to be shipped across the U.S. and Canada. Our site makes it easy to find what you need by integrating factory parts diagrams and descriptions into our search system so you can see exactly what you’re ordering.

Posted in Uncategorized | Tagged , , | Leave a comment

Making and Using Your Own Wood Mulch

A big part of lawn care is gathering up and disposing of dead limbs, leaves and grass clippings. Normally, this material ends up in the trash, but it’s not hard to turn it into mulch that can be used to protect and fertilize plants that are in your garden or integral to your landscaping.

What’s the Difference Between Mulch and Compost?

Both mulch and compost are decomposed organic matter; the difference comes from how much they’ve decomposed. While nutrients from mulch aren’t instantly available like they are with compost, it’s great for ground cover, stopping weeds from growing around plants. Since it doesn’t break down as much before it’s used, mulch doesn’t stink like compost does during its later stages of development, and it’s a lot less finicky when it comes to composition.

What Materials Can Be Used for Mulch?

– Chopped hay and straw

– Leaves

– Grass clippings: Using the mulching mode on your Cub Cadet mower is the most effective way to use clippings as mulch. However, you may want to bag clippings to halt the spread of weeds or when the grass is too wet to be processed. Putting these clipping on your mulch pile lets you return their nutrients to the soil.

– Wood: Twigs can be put directly into the mulch pile, while larger branches and bark need to be chopped up into small pieces. A Cub Cadet chipper/shredder creates chips that are the perfect size for mulching.

– Sawdust: This needs to be from untreated wood since the same agents used on lumber to protect it from rot and weather will also keep microorganisms from breaking it down.

– Pine needles: These are acidic, so they should only be used in small quantities unless the mulch will be applied to plants that thrive in acidic soil like rhododendrons and dogwood trees.

Building a mulch pile can be a near-year-round process. You can start in the summer with grass clippings, then move on to leaves in the fall. When you trim trees and branches during the start and end of the growing season, that wood can be chipped and added to the pile.

Create a Site for Your Mulch Pile

The mulch pile will kill any ground covering, so it’s best to locate it somewhere that will be out of sight. The pile itself just needs something to give it structure, like a ring made of snow fence or chicken wire held up with small fence posts. Covering the pile with a tarp or sheet of plastic will help hold heat and moisture in, increasing decomposition.

Turning Waste into Mulch

The best results are achieved by using a variety of waste sources to create the mulch: by mixing materials, you’ll create a finished product that will have a varied consistency that will be less likely to blow or wash away. Starting the mulch pile with a layer of wood chips and twigs will help with drainage and aeration, but it isn’t required to get good results.

When you add new material or the pile starts to smell, turn the mulch with a garden fork. This will help oxygen reach the microorganisms in the mulch so they can do their job.

Using Mulch

When can you use your mulch? The longer it has to decompose, the more accessible the nutrients will be to your lawn, but even relatively fresh material can be used for ground cover. Keep in mind that new mulch with a high proportion of wood could leach nitrogen from the soil.

Using it around trees, shrubs, and gardens will help manage heat reflected toward the plants in the summer, and it can keep moisture from evaporating. The mulch layer should be three to four inches thick, and some space should be made between the mulch and the plants you want to grow. Worried about dormant weeds sprouting from your mulch? Lay down some newspaper to act as a barrier. It will prevent the seedlings from taking root and will decompose alongside the mulch, integrating into the soil.

If winter temperatures are on their way, wait to apply mulch until after the first freeze. The mulch can act as a blanket, shielding root systems from temperature changes which may keep plants from going into hibernation early enough to protect themselves from the cold. After the freeze, mulch application can help prevent frost heaving.

Where to Get Parts for Your Cub Cadet Equipment

www.cubparts.com is a certified Cub Cadet dealer. That means we carry OEM replacements for everything they make including the mowers, leaf blowers and wood chippers you need to manage your lawn. Our site is built to make it easy to find what you need, letting you view factory parts diagrams and descriptions to correctly identify parts. We ship across the U.S. and Canada.

Posted in Uncategorized | Tagged , , , | Leave a comment

Summer Mower Maintenance

12ABC62J710_product_listing_flash

While you may be taking care of most maintenance when you store your equipment in the winter and get it out in the spring, there are still a few things that need to be done during the season. These tips will help you keep your Cub Cadet mower running at its best from the first time you start the motor to the first snowfall.

Oil

Before starting the engine, check the oil level. Air-cooled engines depend on the oil to both lubricate internal components and move heat from the combustion chamber to the rest of the engine, increasing the effective cooling surface to keep temperatures under control. Some oil consumption is normal on these motors, which means the oil level can drop to a point that will lead to overheating before a full oil change is needed.

Mower Decks and Blades

Wash the deck after each use. Riding and wide deck motors come with a washout port that attaches to a garden hose to clean the deck. If you have a walk behind mower, tip the deck so that the carburetor is facing up to access the deck for washing or blade maintenance. Excessive buildup can be removed by scraping off the deck surface with a putty knife.

Inspect and sharpen the blades. Blades should be replaced if they’re cracked, bent or heavily worn. A dull blade is harder to push through grass, putting a strain on the engine, and it can tear the tips of the grass, opening them up to infection.

On riding mowers and wide walk behind mowers, the blades connected to the engine by a series of belts. These should be inspected and replaced if they show signs of wear including cracking and stretching. The spindles that connect the belts to the blades also need to be greased occasionally.

Air Filters

Depending on your engine, the air filter will use a paper element, a foam element or both.

Paper elements are designed to trap fine particles of dirt in their fibers while maintaining air flow, but surface dirt can cover the surface, restricting air flow. Tapping the filter against a hard surface will loosen this dirt so air can pass through the filter again.

Foam elements use oil to trap dirt. To clean them, the foam needs to be soaked in a non-flammable solvent or washed in a mild detergent. After the filter has dried, it should be soaked in engine oil, then any excess oil should be squeezed out before re-installation. The type of oil doesn’t matter so long as it’s clean.

When cleaning the filters, remember to wipe out any dirt inside the filter housing. Buildup can block the entrance of air which can keep the engine from running at peak performance.

Fuel

Modern fuel doesn’t age well, which can lead to power reduction and starting issues in small engines. While ethanol is blamed for a lot of fuel problems, it also acts as a solvent, inhibiting the formation of gums inside the fuel. That means even if you buy ethanol-free gas, you can still end up having problems due to varnishing inside the fuel system.

For most equipment, fuel should be used within 30 days of purchase or within 90 days if it has been treated with a fuel stabilizer. This includes fuel injected engines: they may not need the same after season maintenance as carbureted motors, but they still need fresh fuel.

Spark Plugs

Having trouble starting the engine? Check the spark plug for carbon buildup and electrode wear. While the plug should last through the season, problems with the oil and fuel systems can lead to premature wear.

Vibration

Over time, engine vibration can literally shake your equipment apart. Checking the tightness of the bolts on your equipment, particularly around the handle, will keep you from losing them when you’re mowing.

Ensure Reliability with Genuine OEM Parts

www.cubparts.com is a certified dealer for Cub Cadet as well as the manufacturers of engines used in their professional models including Kawasaki and Honda so we can provide you with everything you need to keep your equipment running this summer. Our site has built-in factory parts diagrams and descriptions to make it easy to find what you’re looking for, and we can ship those parts to any address in the U.S. and Canada.

Posted in Uncategorized | Tagged , , | Leave a comment