How to Sharpen the Blades on Your Cub Cadet Mower

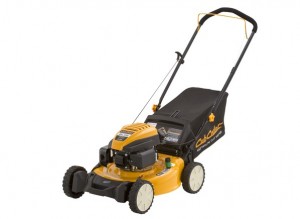
SC 100 Walk-Behind MowersWhen do you need to sharpen your Cub Cadet’s blades? How can you sharpen them to get the best cutting performance? How do you get them out of the deck to begin with? Here’s everything you need to know to keep your blades delivering a quality cut.

How Often Do I Need to Sharpen My Mower’s Blades?

– At least once per year for residential mowers. Depending on the amount of acreage they’re covering, commercial mowers may need to have their blades sharpened anywhere from monthly to weekly.
– After striking a rock or other hard object.
– After cutting plugs left over from aerating.
– Any time the blades leave behind broken leaf tips. If the edges are jagged, then the blade is tearing the grass instead of cutting it. This makes it harder for the grass to recover and leaves it open to infection.

When Do I Need New Blades?

Blades can be sharpened several times over their life, but eventually, wear or damage will make them unusable. Replace the blades if you see any of the following:

– The blade ends are getting thin.
– The blade is bent.
– There is a crack in the metal.

If you live in an area with sandy soil, you may want to consider switching to sand blades. These are made from abrasion resistant metal, so they’ll last longer.

Removing the Blades

Park the mower on a level surface and disconnect the spark plug or plugs to prevent the engine from starting.

When accessing the deck on a walk-behind mower, tilt it so that the carburetor and air filter are pointed up to prevent flooding. Blades on other mowers can be accessed by raising the deck to its maximum height.

If your deck uses the Fastattach system, simply push up on the collar and twist the blade until it slides off of the spindle.

For all other mowers, clamp the end of the blade to the deck using a blade removal tool. If you don’t have this tool, you can jam a wood block between the blade and the deck to keep the blade from spinning. Remove the blade bolt. The blade and blade adapter should slide off of the driveshaft or spindle.

Sharpening

The Cub Cadet sharpening kit includes a stone that can be mounted to any drill, or a mill bastard file can be used to remove metal without power tools. When using either tool, keep the blade clamped in a vise. The blade can also be filed with a grinding wheel. If you use Cub Cadet’s Xtreme blades, you may still want to use a mill file or sharpening stone to sharpen the smaller edges on the end of the blade.

When sharpening, maintain the original grind angle to get the best cutting performance. The finished cutting surface should be as sharp as a butter knife.

Balancing

If you have the blade balancing and sharpening kit, place the center of the blade on top of the included cone. The blade should sit level. If it doesn’t, remove metal from the corner that is pointing downward. Keep checking and filing the blade until it balances on the cone.

If you don’t have the balancer, you can still balance the blade by hanging it from a nail. If the blade is balanced, it will sit level. If it doesn’t, file some of the metal off of the side pointed down. Keep checking and filing the blade until it balances on the nail.

Installing

To install a Fastattach blade, push the blade onto the spindle, lift the collar, and turn the blade until it locks into place.

On all other mowers, lubricate the inside of the blade adapter and the crankshaft or spindle with light oil. Insert the blade adapter into the blade. The side of the blade with “Bottom” or the part number printed on it should face the ground. Using a new bolt, attach the blade and adapter to the driveshaft. Tighten the bolt to the torque specified in your mower’s owner’s manual.

Need Parts for Your Cub Cadet?

Cubparts.com ships parts and accessories for Cub Cadet across the United States and Canada. As an authorized dealer, we’re able to offer OEM parts and accessories including Xtreme, sand and mulching blades as well as sharpening kits and replacement stones. Not sure what will fit your mower? Our site can look up parts based on your equipment’s model and serial number and will show you factory information including parts diagrams. That means you can always be sure you’re ordering exactly what you need.

Posted in Uncategorized | Tagged , , | Leave a comment

How to Drain and Replace Gasoline In Your Mower

SC 100 Walk-Behind MowersIs your Cub Cadet mower not running right? Are you worried about problems with hard starting and poor idle? In most cases, these problems can be traced to poor fuel. Here’s what you need to know about when, how and why to drain your mower’s fuel system.

Why Do I Need to Drain the Fuel from My Mower?

Gasoline formulations are developed with modern cars in mind, which causes problems with small engines, especially as the fuel ages. How this happens depends on the fuel blend.

Ethanol is hygroscopic, as it sits, it absorbs water and falls out of suspension, which can lead to starting problems and corrosion.

“Pure” gasoline doesn’t benefit from the solvent properties of ethanol, so it degrades quickly. As it breaks down, it varnishes components and forms waxes that clog the fuel line and carburetor.

While the gas you put in the tank of your car will be burned in a week or two, it can take weeks or months to use up the fuel in the gas can you use for your mower. Carburetors also aren’t as good at getting fuel to vaporize, and as that fuel gets older, it doesn’t vaporize as easily. Even without the problems of corrosion and lacquering, the engine will get harder to start as the fuel sits.

When Do I Need to Drain the Fuel?

On most engines, all gasoline needs to be used before it goes stale. Cub Cadet and their engine partners, including Kohler, Honda, Kawasaki and Briggs & Stratton, recommend using fuel within 30 days of purchase. This can be extended to 90 days if the fuel is mixed with a stabilizer shortly after purchase. As a general rule, the fuel system should always be drained before putting the mower into storage for the winter.

There is one exception to this rule: Cub Cadet EFI engines. These can use untreated fuel that is several months old, and they can be stored during the off-season with stabilized fuel in the tank. This is not recommended for EFI-equipped engines from other manufacturers.

Draining Fuel from a Honda GXV630

This engine is used in some versions of the RZT Series ZTR mower.

1. Disconnect the fuel line from the carburetor and place the end of the line in a suitable gasoline container.
2. Once fuel stops draining from the line, reattach it to the carburetor. Loosen the carburetor drain screw, located on the top left side of the air filter cover. Drain this fuel into the gas container.
3. Tighten the carburetor drain screw.

Draining the Fuel Tank on All Other Mowers

To drain the tank, you will need a siphon pump. If you have a walk-behind mower, do not try to tilt the mower to let fuel pour out of the gas tank: this will flood the carburetor and possibly soak the air filter.

Fuel should be drained only when the engine is cold. Disconnect the spark plug or plugs to prevent the engine from starting accidentally.

1. Unscrew the gas cap.
2. Place the suction tube of your siphon pump in the tank, and the outlet tube in a gas container.
3. Prime the pump by moving the handle up and down or squeezing the priming bulb two or three times. Once fuel starts flowing, it will continue without needing to be hand-pumped.

Draining the Fuel Lines and Carburetor

Once the fuel tank is empty, the rest of the fuel can be drained by starting the engine and letting it run until it stalls. This should be done on all carburetor-equipped engines, including the Honda GXV630, before storing to remove remaining fuel inside the float bowl and jets.

What Can I Do with Stale Fuel?

If the fuel is clean, the EPA recommends adding it to the tank on your car or truck. Fuel-injected engines are less sensitive to stale fuel, and this fuel will be diluted by the gas already in the tank.

If the fuel is contaminated with debris or water, it should be taken to a hazardous waste center for disposal.

Need to Fix Your Cub Cadet?

If it’s Cub Cadet, you can get it from www.cubparts.com. We offer a full selection of OEM parts for Cub Cadets and their engines including hoses and carburetor parts, as well as StarTron fuel stabilizer. Our site can find parts based on your model and serial number, and factory diagrams are built into the search so you can be sure you’re ordering exactly what you need. We ship across the U.S. and Canada.
Posted in Uncategorized | Tagged , , | Leave a comment

Storing Your Log Splitter

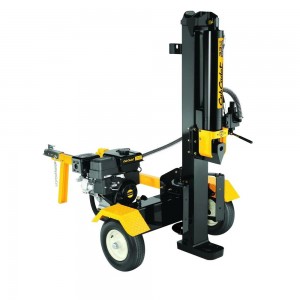
cub-cadet-log-splitters-ls-33Whether you harvest wood in the spring or fall, your Cub Cadet log splitter only sees use for a few weeks at a time. That makes proper care during storage more important on these models than nearly any piece of outdoor equipment you’ll ever own. These tips will help you store your machine properly so it will be ready to use the next time you need it, whether you have an LS 25 CC, LS 25 CC H, LS 27 CC HP or LS 33 CC.

Engine

Gasoline should only be kept in your log splitter’s engine for up to 30 days, or up to 90 days if it was treated with a fuel stabilizer when purchased. For longer term storage, the fuel system should be drained to prevent corrosion and lacquering.

Use a siphon hose to transfer fuel from the gas tank to a storage container. Fuel can be drained out of the rest of the Honda GC160’s fuel system by removing a drain screw on the base of the carburetor. The 208cc Cub Cadet engine doesn’t have a drain.

Once the fuel is removed, start the engine and let it run until it stalls. This will remove any remaining
fuel. The gasoline you removed from your machine can be used by adding it to the fresh gas in your car’s fuel tank.

Inspection

Look over the hydraulic system, checking for loose connections and leaks. When checking the fluid level in the tank, be sure to thread the dipstick all the way into the reservoir to get an accurate reading.

Check the pump coupler between the pump and the engine. This coupler is made out of nylon to absorb vibrations and cut the transfer of power to the pump if it overloads. Over time, this material will harden and turn brittle. If you see cracks forming on the surface, now is a good time to fit a replacement.

Tires

Air up the tires to the recommended pressure printed on the sidewall. 30 psi is recommended for current splitter models.

Cleaning

Do not spray your log splitter with water from a garden hose or pressure washer. This can push water into the bearings or engine, which can lead to rust, oil contamination, and other damage.

The pump reservoir dipstick and gas cap both have vent holes that need to be clean and open to let in air. Use a moist rag and a brush to clean off debris on the engine, paying particular attention to the cooling fins and the area around the spark plug.

To prevent rust, coat components with a thin layer of oil, applied using either an oily rag or a can of spray lubricant. Pay particular attention to both sides of the beam and any unpainted metal components.

Storage

Do not store the splitter in a building with sources of open flame or spark including furnaces, dryers, and power tools. Even when drained, the fuel system may release flammable vapors that can ignite. The splitter should also be stored away from corrosive substances, including acids and fertilizer.

The beam can be locked in the horizontal or vertical position to fit the available storage space.

Placing cardboard underneath the machine before storage will absorb any leaking oil or hydraulic fluid. It also makes it easier to trace leaks when you pull the splitter out for the next wood cutting season.

Need to Fix Something On Your Cub Cadet?

Cubparts.com takes the guesswork out of finding the right part: Just select your model and serial number, and our site will show you parts broken down into different systems with diagrams and other information. We’re a certified dealer for both Cub Cadet and Honda so you can get everything you need for your log splitter shipped to your door whether you’re in the U.S. or Canada.

Posted in Uncategorized | Tagged , , | Leave a comment

Get More from Your Mower With Cub Cadet Accessories

Installing a Mulch Kit On Your Cub Cadet Riding MowerYou bought your Cub Cadet mower to mow, but did you know it can do a lot more? Cub Cadet makes a wide range of accessories better cutting performance, more usability and more utility. With the right equipment, you can turn your mower into a bagger, a seeder and even a snow blower.

Blades, Bags and Mulching

High lift blades throw grass cuttings upward into the mowing chamber for repeated cuts to make fine mulch. 2-in-1 blades have a balanced design to both mulch and bag, while 3-in-1 blades can mulch, bag and side discharge without being changed.

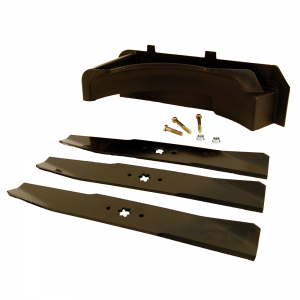
Mulching kits include high lift blades and a mulch plug. This plug covers up the chute opening on the deck to keep grass inside the mowing chamber. Kits for constructed decks also include baffles, sealing away parts of the deck to increase vacuum. This gives the blades more time to trim clippings down to size.

Sand blades are made with abrasion-resistant materials so they won’t wear down as fast as regular blades in areas with sandy soil. Xtreme blades have added cutting edges for slicing through thick, overgrown grass.

Bagger kits have a discharge chute, mounting brackets and bags to collect clippings. These work best with high lift blades, as the mulched clippings pack down better in the bag.

Bluetooth-Enabled Maintenance Meter

An hour meter makes it easy to keep track of maintenance. By adding Bluetooth, the meter is able to communicate with your smartphone through the Cub Connect app. Available for Android and iOS, this app lets you keep a maintenance record, watch instructional videos for basic maintenance tasks, and gives you quick access to your mower’s manuals, so you have everything you need to do repairs in your pocket. Meters are available for most recent tractors and ZTRs.

Armrests

Armrests are included with several mower models, but they can be added to any model using a kit.

Trailers

The Hauler is a dump bed trailer that holds 10 cubic feet of soil, fertilizer or whatever else you need to transport around your property. The dump mechanism uses an assisted foot pedal, making it easy to unload. Folding sides give you easy access for loading, or can be folded in completely for storage.

Need more space? The 12.5 cubic foot swivel/dump cart doesn’t fold, but it has the same foot-operated dump mechanism as the Hauler.

Want something simpler and easier on your wallet? The 8 cubic foot poly cart is perfect for general work, while the 12-foot steel cart can carry up to 1,000 lbs. and has a removable tailgate for easy unloading. Keep in mind that your mower’s towing limit may be lower: Cub Cadet recommends towing no more than 250 lbs. with an RZT mower.

Weather Protection

The sunshade has a simple pole frame that supports a roof and can be easily removed when it’s time to store the mower.

For winter use, Cub Cadet makes a combination sun shade/snow cab for XT lawn and garden tractors. The frame normally supports a fabric roof for summer use and has places to attach side panels and a windshield to protect the operator from cold winds.

Lawn Care

Need help with your garden? The disc cultivator breaks up clumps in plowed soil and mixes in amendments like lime and gypsum to support root growth, while the box scraper levels soil for planting or construction.

The broadcast spreader holds up to 175 lbs. of seed or granular fertilizer that is dispersed using a wheel-driven mechanism.

In the fall, leaves can be picked up using a 44 or 50 inch-wide lawn sweeper.

Snow

The snow blade attaches to the front of XT Series lawn tractors. Using a handle that is within reach of the operator, the blade can be moved 25° left or right to steer snow, while a spring return brings the blade back to center for gathering piles.

The 42-inch snow thrower uses the same three-stage system as Cub Cadet’s 3X snow blowers. The center auger breaks up large chunks of snow before heading toward the chute, clearing dense snow up to 50% faster than an equivalent two stage snow blower. This heavy-duty attachment is only compatible with XT3 lawn tractors.

Traction

The weight bracket holds suitcase weights that can be added or removed without tools. Adding weight balances the tractor when using front-mounted implements, improving traction and performance.

Tire chains help the rear wheels bite into slick surfaces, improving performance in the winter.

What Happens if an Accessory Breaks?

If your Cub Cadet accessories break, you can get everything you need for repairs at www.cubparts.com. We sell OEM parts for everything Cub Cadet including accessories, and we can ship blades and mulching kits to your door whether you’re in the U.S. or Canada. Our site even has factory diagrams built in so you can see exactly what you’re ordering.

Posted in Uncategorized | Tagged , , | Leave a comment

Snow Blower Troubleshooting

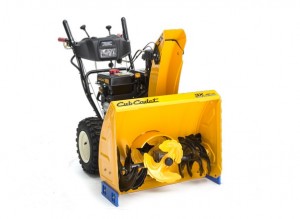
Cub Cadet 3X SnowblowerAre you having trouble getting your Cub Cadet snow blower to start? Is it leaving snow behind or not moving it as far as it should? These tips will help you find and fix common problems with these machines so you can get back to clearing sidewalks, driveways and parking lots.

Clogged Chute

If snow stops coming out of the chute, release the auger and drive control, and stop the engine as soon as possible. Remove the ignition key to prevent an accidental start: you don’t want the auger to start moving if your fingers are near it.

Once the auger and impeller have stopped spinning, remove the clean-out tool, usually attached to the back of the auger housing. Use the shovel-shaped end to break up snow and ice that has gathered inside the chute and the auger housing. Once everything is clear, put the tool back in its clip and restart the engine. Run the auger for a few seconds to clear out any remaining snow before going back to work.

Auger and/or Impeller Doesn’t Turn

– The augers and impellers are attached to the drive shafts using shear pins. These are designed to break if one of these parts gets jammed, preventing serious damage to your machine. To change the pins, shut off your snow blower, let it come to a complete stop, and remove the ignition key. Inspect the auger housing for clogs and debris that may have caused the jam and remove them. The pins go into holes on the auger and impeller near the bearing supports, transmission, and belt drive.

– The drive belt may be broken, or it may have stretched to a point that there isn’t enough tension to transfer power to the auger and impeller. Single stage snow blowers have a drive belt underneath the cover on the left side of the auger housing. Two and three-stage snowblowers have a drive belt between the auger housing and the engine.

– Stretched cables can keep the drive from engaging. Newer machines have adjusters on their control cables either next to the handle or at the base of the machine. Loosen the jam nut, then spin the adjuster nut until the auger or drive engages and disengages cleanly. Tighten down the jam nut. On older models, stretched cables must be replaced with new ones.

Drive System Doesn’t Operate

– Check the drive cable as instructed above.

– Check the friction wheel for wear. If the rubber layer is less than 1/8 inch thick, it’s due for a replacement.

– The transmissions used on hydrostatic snow blowers are designed to be maintenance free, offering years of trouble-free use. If the transmission is leaking, it’s due for a rebuild or replacement.

Engine Doesn’t Start

– If you’re using an electric starter, make sure it’s connected to an outlet with an extension cord rated to handle at least 15 amps to handle the motor’s power draw.

– Unlike most Cub Cadet equipment, the engines used in these machines have manual chokes. Closing the choke will help the engine start in cold weather.

– Inspect the spark plug. Check your engine owner’s manual for the correct spark gap, and replace the plug if the electrode or insulator is damaged.

Engine Stalls

– After starting the engine, let it run for a minute or two, opening the choke as the motor warms up. Don’t start using the snow blower until the engine idles smoothly with the choke open.

– Check the holes on the top of the gas cap. If these are clogged, air can’t enter the tank, prevent fuel from flowing into the carburetor.

– Stale fuel can clog carburetor jets and fuel lines and can keep the float bowl from moving freely. Always use fresh fuel treated with a fuel stabilizer. Replace treated fuel after three months.

The Snow Blower Isn’t Picking Up All of the Snow

– Slow down and overlap more with each pass.

– Check the skid shoes and scrape plate to make sure they’re level and at the correct height.

– Check the auger housing for clogs and build up.

Need Parts to Fix Your Equipment?

You can get everything you need for your Cub Cadet by visiting www.cubparts.com. As an authorized Cub Cadet dealer, we sell all the OEM parts and accessories currently available for these machines, and we can ship them to any address in the U.S. or Canada. Our site has a section for commonly ordered snow blower parts, or you can use our search engine to find parts specific to your model. We even have factory parts diagrams so you can see what you’re ordering and where it fits on your blower.

Posted in Uncategorized | Tagged , , | Leave a comment

Snow Thrower Cab Installation

Cub Cadet Snow ThrowerNo matter how good your snow blower is, it’s never fun to have to walk around in winter weather. Installing a cab on your two-stage Cub Cadet can make things more comfortable by deflecting wind. Here’s how you can turn the pile of rods, poles, and fabric in the kit into something that will make clearing snow a little easier.

Preparing for Installation

Wait at least a half hour after using your snow blower before installing the cab. This gives the engine and exhaust time to cool down.

Set your snow blower on a flat, level surface.

Wear safety glasses. Some parts of the cab will be under tension during assembly and can snap back.

Make sure you have all the parts you need for assembly. The rods, poles, and clamps are labeled with letters A through M, and there will be a bag of hardware, including set screws, nuts, bolts, and washers as well as a wrench to tighten the screws.

Most of this assembly can be done by one person, but it’s helpful to have someone on hand to hold the cab when you’re positioning it on your snow blower.

Assembling the Cab

1. Slide the A and B bars together and screw in the set screws until they’re finger tight. These screws will be tightened down later once the cab is fully assembled.

2. Insert the E bar into the ends of the A and B bars you just put together. The nut on the E bar should face the inside of the frame. Install set screws in the E bar, leaving them finger tight.

3. Connect the F poles to the E bar with the narrow ends facing up.

4. Insert the G poles into the ends of the A and B bar assembly with the narrow ends facing up. Install set screws, leaving them finger tight.

5. Connect the curved D and C rods, matching up the arrows on their ends. Install the set screws, tightening them down fully.

6. Attach the curved D and C rods onto the tops of the G poles.

7. Open the fabric cab cover and located the inner sleeves. Insert two of the flexible H rods through these sleeves and attach them to the top of the F poles.

8. Insert the two remaining H rods and bend them over until you can insert them into the ends of the H rods that are supporting the cab cover.

9. Pull the cab cover over the rod assembly, sliding the rods into the pockets inside the cover.

10. Tighten the set screws that were left finger tight during assembly.

11. Pull the cover down and over the D and C rod assembly. Slide the elastic straps on the end of the cover around the A bars.

12. Attach clamps K, L, and M using the included nuts, bolts and washers, leaving the bolts loose. Depending on your snow blower model, clamp L may be vertical or horizontal to meet up with the handlebars.

13. Hold the cab frame over the snowblower to find a comfortable mounting position. The cab should cover the handlebars, but still leave enough headroom for you to stand comfortably when at the controls.

14. Mount the K, L and M clamps to the upper handlebars.

15. Center the J crossbar against the clamps and tighten down the nuts and bolts on the K and L clamps.
Insert the front ends of the cab cover into the ends of the crossbar. Use two set screws to attach the cab to the J bar.

16. Check and adjust the position of the cab cover. Tighten down all set screws. If your snow blower has lights, they can be uncovered by unzipping the flaps on the front of the cover. Otherwise, the flaps can be left closed for increased weather protection.

Where Can I Get a Snow Cab?

Cubparts.com is a certified Cub Cadet dealer, so we’re able to ship accessories like the snow cab as well as OEM parts to any address in the U.S. or Canada. Our site can show you parts as well as diagrams and descriptions from the factory that are specific to your model so you can always be sure you’re ordering what you need.

Posted in Uncategorized | Tagged , , | Leave a comment

The New XR3: Cub Cadet Enters the Robot Mower Market

XR3 Robotic Mower Cub CadetRobotic mowers can be convenient, but their low power means most owners will still need to use a regular mower now and then to cut their grass. However, Cub Cadet’s new XR3 packs enough power to handle thick, tall grass so it can be your only mower. Add in advanced features like app-scheduled mowing and rain sensing, and you have a machine that takes the work out of managing a suburban lawn.

A Robotic Mower with Serious Power

Most robot mowers on the market use a tiny blade to trim the ends of the grass, limiting their use to frequent, shortcuts. Look underneath the XR3, and you’ll find a pair of triangular blades that wouldn’t look out of place on a brushcutter. This is backed by 400 watts of cutting power, putting it on par with a small walk-behind mower.

The XR3 has two modes. Most of the time it can run in Eco mode, performing a light trim to give the lawn an even, manicured finish. In Turbo mode, the blades run at top speed while mower speed is cut in half, giving it the power to cut tall grass, whether it’s at the start of the mowing season or after heavy rains.

Unlike other robotic mowers, the XR3’s 22 inch-wide deck extends past the wheels, cutting closer to buildings and curbs so you’ll have less trimming to do. Cutting height can be set anywhere from ¾ to 3.5 inches. This mower can handle slopes up to 20 degrees, so hills are no problem.

A Quiet Cut

The average mower puts out 90 dB of noise, but since it doesn’t have an internal combustion engine, the XR3 is much quieter. It produces 66 dB of noise in Eco mode, the same as the ambient sound in a busy restaurant, and 74 dB in Turbo mode, which is a little quieter than a vacuum cleaner.

How Does It Work?

When the mower is installed, perimeter wire is buried in the soil to define the edge of the lawn and obstacles including buildings and trees. From there, the mower can be programmed using an app available for iOS and Android.

The lawn can be split up into zones, letting the mower cut one section at a time. Paths can be defined to tell the mower where to cross sidewalks and driveways, shutting the blades off automatically when it reaches them. Once everything is set up, mowing times can be scheduled using the app’s calendar.

Rain sensors tell the mower when the grass is too wet to mow. If this happens, the mower will return to its base station and reschedule.

How Long Can It Mow?

The XR3 can mow for 55-70 minutes, depending on the mowing mode and condition of the lawn. Recharging usually takes 90-110 minutes. Occasionally the charger will take longer to balance the batteries, extending their life. The mower will automatically drive back to its base station and recharge when the battery is low.

What if Something Happens to the XR3?

Most situations are covered by the mower’s design:

– The blades stop automatically if the mower is lifted or tilts over.

– The mower can be controlled manually by connecting via Bluetooth so you can drive it back if it gets lost.

– The mower has built-in GPS to keep track of where it is on the lawn. If the mower is removed from the property, Cub Cadet can tell you exactly where it is.

– The mower can stay outside on the docking station during the mowing season, but it may need to be moved inside to protect the batteries from low temperatures in the winter.

How Much Does it Cost to Operate?

Power costs will vary depending on your local electricity prices, but most owners can expect their electric bill to go up by $3-$5 per month while the XR3 is in use. The electric motors are maintenance free, but you’ll still need to replace wear items like the blades and wheels over the course of the mower’s life.

Models

Cub Cadet makes three versions of this mower, each designed around a specific size of lawn:
3000: Mows up to 1/3 acre, uses 22 kWh/month on average, and has regular drive motors.
4000: Mows up to 2/3 acre, uses 27 kWh/month and uses heavy-duty drive motors
5000: Mows up to 1 acre, uses 34 kWh/month and uses heavy-duty drive motors

How Long Will It Last?

The XR3 comes with a two-year warranty. Cub Cadet says the expected service life is between 5 to 7 years including the battery.

Where Can I Get Parts for This Mower?

While the rollout of this new product is limited to a handful of dealers, you can get all the parts you need for your XR3 from www.cubparts.com. Just select your model and serial number, and our site will show you parts specific to your model. We ship across the U.S. and Canada.

Posted in Uncategorized | Tagged , , | Leave a comment

Cub Cadet’s New Ultima Mowers

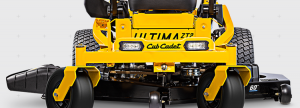
Cub Cadet’s New Ultima MowersCub Cadet’s new Ultima ZTR isn’t just an update, it’s an all-new model that uses new construction techniques. The result is a level of performance and comfort that would make it competitive in the commercial market, yet it’s sized and priced to be within reach of consumers.

Comfort

The first thing most people notice when seeing the new Ultima is its unusual frame. Instead of using a flat ladder frame, it uses a continuous, fully welded 2×2 inch tubular square spaceframe that wraps around major components, adding stability and stiffness while keeping weight down.

The operator sits in a high back seat attached using polymer isolation mounts, while the foot plate has a rubber mat and the lap bars have overmolded hand grips. Together, these parts limit the transfer of vibration to the operator, making the Ultima exceptionally comfortable. Getting a good hand position is easy: just loosen the knob near the base of the lap bar, hold the bar where it feels comfortable, and tighten the knob back down. No tools are required.

Need to mow when the sun isn’t cooperating? LED work lights are built into the foot plate so you can mow when it’s cloudy or dark out.

Decks

The Ultima is offered with decks ranging from 42 to 60 inches. Deck height is set using a spring assist foot lever coupled to a large, clearly-marked knob next to the operator. Just push down on the lever and twist the knob to one of 15 settings ranging from 1 to 4.5 inches.

All but one model comes with Cub Cadet’s new Aeroforce deck. It uses a constructed shell with internal baffles and blades designed to deliver performance approaching that of a stamped deck. In independent tests conducted by Ohio State University, the Aeroforce outperformed every competing deck in the market segment, delivering a better finish with less clumping.

All models have an offset front axle that lets you get closer to curbs and edges, reducing the amount of trimming you’ll need to do after you mow.

Serviceability

The frame is built so that it surrounds the engine, protecting it from impacts without blocking large sections like the steel panels used on most ZTRs. The spindles are maintenance free, and the footplate can be pulled out to get access to the belts without having to remove the deck. The battery can be accessed by flipping up the seat.

Power

The Ultima is available with Kohler’s 7000 Series and Kawasaki’s FR Series. Both models are consumer engines, but they’re based on their professional counterparts. Full pressure lubrication systems and heavy-duty air cleaners help ensure a long life.

Models

ZT1 42
This model has a 22 HP Kohler 7000 Series engine and uses a pair of Hydro-Gear EZT-2200 wheel motors that can propel the mower to a top speed of 7 mph going forward and 3 mph in reverse. Its 42-inch deck is the only one in the lineup that uses a stamped shell, trading durability for a better finish.

ZT1 46
This model has the same engine and hydrostatic system as the 42, but it comes equipped with a 46-inch Aeroforce deck.

ZT1 54
Step up to this model and you’ll get a Kohler 7000 rated at 24 HP and a 54-inch Aeroforce deck.

ZT1 50
This model uses a 23 HP Kawasaki FR Series and comes with a 50-inch Aeroforce deck.

ZT2 50 and 54
ZT2 models use ZT-2800 hydrostatic motors, increasing top speed to 7.5 mph going forward and 3.5 mph in reverse. The ZT2 50 has a 50-inch Aeroforce deck, while the 54 has a 54-inch deck. Both models are powered by a 23 HP Kawasaki FR Series.

ZT2 60
The top-of-the-line Ultima mower has a 24 HP Kawasaki FR Series and a massive 60-inch Aeroforce deck.

Warranty

Cub Cadet offers a limited lifetime on frame and fabricated deck shell. Kohler and Kawasaki guarantee their engines for three years with no hour limit, and Cub Cadet offers the same guarantee for everything on the mower aside from the deck and engine.

Getting Parts and Accessories

You can get everything you need for this mower from www.cubcadet.com. We’re a certified dealer for Cub Cadet, Kawasaki, and Kohler, which means we’re able to offer OEM replacements for your new Ultima. Finding the right part is easy: just type in your model and serial number, and our site will show you factory descriptions and parts diagrams for your mower so you can see exactly what you’re ordering. We ship parts across the USA and Canada.

Posted in Uncategorized | Tagged , , | Leave a comment

Tips for Taking Care Of Your Lawn This Winter

Tips for Taking Care Of Your Lawn This WinterYou might be done with mowing, but there are still some things you can be doing to help your lawn survive the winter and get a good start when it comes out of hibernation this spring.

Mow Close

For your final mow, cut the grass as short as possible without cutting into crowns. This will keep the grass from holding moisture that can encourage the growth of pests and diseases like snow mold.

Look for Weeds

If you live in an area that doesn’t freeze over in winter, grass growth will slow down instead of going into hibernation. Likewise, weeds won’t be out in force, but they’ll still be active. Treating them now is easier than trying to halt their growth when they start germinating in the spring.

Clean Up Your Lawn

Before the first snowfall, do a sweep of your yard and remove toys, decorations, chains, bar-b-q grills and anything else lying on the grass. The weight of these objects can create dead spots in your lawn, especially when they’re loaded down with snow.

Mark Your Pavement

After heavy snowfalls, it can be hard to see where the pavement ends and your lawn begins. Placing snow stakes at the edge of your driveway and sidewalk will keep you from pushing your snow blower into the turf where the auger can claw through the soil.

Avoid Lawn Traffic

Foot and vehicle traffic can compact soil, stunting grass growth and increasing weeds. Add in ice, wet soil and, hibernating grass, and you have a recipe for lawn destruction. Avoid parking vehicles on your lawn, and keep your sidewalks clear to encourage visitors to walk on them. This is especially important when your lawn is covered in ice: whenever an ice-encased blade is stepped on, the ice tears the blade apart, leaving a small bald spot.

Control Salt Applications

Salt can clear the last layer of ice on your pavement, making it safe to drive and walk on. However, that salt doesn’t just disappear when it’s dissolved: the resulting saline water can kill your grass. Try to stick to the minimum application density listed on the package, and avoid application next to grass and plants. If you need to cover a large area, use calcium chloride-based ice melt. It won’t make runoff salty, and it works at much lower temperatures than rock salt.

Take Care of Your Evergreens

While most plants go into hibernation during the winter, evergreens are still active, making them susceptible to damage from harsh winter conditions. A combination of dry conditions, cold temperatures and heavy winds can strip away moisture, causing desiccation or “winter burn.” First appearing as yellow or red-tipped needles, this discoloration can spread into branches as the plant dries out.

To protect your evergreens, cover the root zone with mulch. This creates an insulating blanket that prevents freezing. If you have an evergreen that was planted recently, consider covering it in a burlap sack during hard freezes to shield it from wind. Keep watering these plants until the ground is frozen, aiming for a total of one inch of water per week including rainfall.

Take the Time to Fix Your Lawn Equipment

Now is a great time to fix your equipment so it’s ready for next spring, whether that means getting a new bag for your mower or doing a complete overhaul. Cubparts.com is an authorized dealer for Cub Cadet and their manufacturing partners including Briggs & Stratton and Kohler, so we’re able to offer replacement parts for everything on your equipment. Just pick your model and serial number, and our search engine can show you factory diagrams and descriptions to help you find the part you need. Looking for accessories? We carry those, too. No matter what you order, we can ship it to any address in the U.S. or Canada.

Posted in Uncategorized | Tagged , , | Leave a comment

How to Set Up a Cub Cadet 3X Snowblower

Cub Cadet 3X SnowblowerIf you need serious snow clearing power, it’s hard to beat a Cub Cadet 3X snowblower. With an auger dedicated to chopping up clumps of snow, these machines have no problem moving the densest snowfall. If you just bought one of these machines, these tips will help you get it running and set it up for maximum performance.

Unfolding the Handle

If your snowblower was shipped with rubber bands around parts of the handle, these can be removed after the handle is in its operating position.

1. Push the shift lever all the way forward.
2. Check the rollers on the bottom rear of the machine and make sure the cables are seated.
3. Tilt the top half of the handle back and tighten down the wing knobs that connect the bottom and top half of the handle.

Installing the Chute

1. Remove the nut and screw from the chute control assembly, located in the center of the snowblower. Lift the assembly off of the support bracket and set it aside. Remove the clevis and cotter pins from the support bracket.
2. Push the chute down onto the auger opening with the top of the chute facing forward.
3. Reinstall the chute assembly.
4. Slide the crank rod through the bracket on the rear of the handle.
5. Remove the cotter pin on the end of the crank. Line up the holes on the crank and crank rod. Slide the crank rod into the crank and push the cotter pin through the hole.

Drift Cutters (If Equipped)

If your snowblower came with drift cutters from the factory, they will be installed backward on the auger to save space.

To install the cutters correctly, remove the pair of wing knobs and carriage bolts from each drift cutter. Place the drift cutters against the auger housing with the blades extending up and forward. Reinstall the knobs and bolts.

Lamp Wiring Harness (If Equipped)

The wiring harness is installed on the snowblower at the factory, but it’s positioned in a way that it could come in contact with the engine, melting the wires. To prevent this, slide the cable through the cable tie on the bottom half of the handle until the cable runs toward the left side of the handle, well away from the recoil starter.

Shear Pins

An extra set of shear pins is included from the factory. Some models have built-in storage for these pins on the console between the left control handle and the shift handle.

Tire Pressure

The tires come overinflated from the factory. Deflate the tires until they’re at the pressure listed on the sidewall.

Skid Shoes

These are installed in their highest position from the factory, which is fine for flat, even surfaces. If you need to remove snow from uneven surfaces, loosen the nuts holding the shoes onto the sides of the auger and slide them into the middle or low position. Tighten the nuts and bolts to fix them into place.

Auger Control Cable Tension

Do the following to check the tension before you first use the snowblower, and after each tension adjustment:

1. With the engine running, squeeze the auger lever for 10 seconds, then release. Repeat 5 or 6 times.
2. Set the throttle lever to the “Fast” position. Watch the auger and make sure there is no movement. If there is, shut the engine off immediately and loosen the auger cable.

The auger cable has an adjuster directly below the auger lever on the left control handle. To adjust the tension, loosen the screw on the adjuster, then twist the adjuster in or out. Once the tension is set, tighten the screw. When the auger is disengaged, there should be a slight amount of slack in the cable.

Get Replacement Parts Now for Less Downtime This Season

Extra belts and shear pins can make the difference between finishing a job and having to wait days to get your snowblower up and running again. If you need spare parts or you’re doing repair work to your Cub Cadet, visit www.cubparts.com. We’re a certified dealer for Cub Cadet and their engine partners, which means we’re able to ship the replacement parts and accessories you need to any address in the United States or Canada. Our site has sections for commonly-needed parts like shear bolts and skid shoes, or you can use our advanced search engine to find parts specific to your machine. We even have factory diagrams and descriptions built into our catalog so you can see exactly what you’re ordering.

Posted in Uncategorized | Tagged , , | Leave a comment