
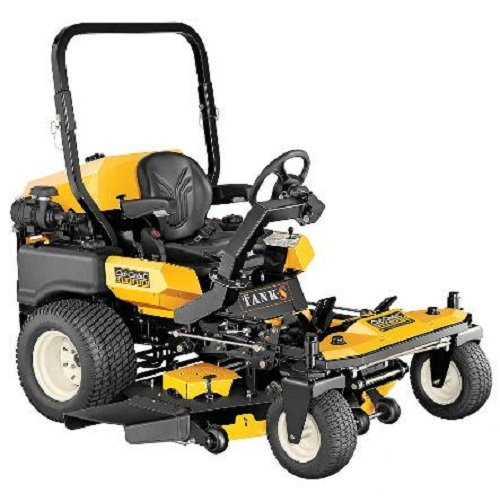
 When starting up your Cub Cadet riding mower this summer, be sure that it is in top condition. Like any machine, riding mowers require their owners to follow a maintenance schedule. Any maintenance schedule for mowers should include routine blade inspection and maintenance. Unlike a lightweight push mower, riding tractors cannot be safely rolled over; to access the blades, owners must remove the deck and access the blades from there. Fortunately, the procedure is relatively simple.
Why Replace Your Blades?
The simple reason to replace one’s blades is that blades wear out. The blades are the central component of any mower. Without properly functioning blades, operators may experience an uneven cut or damage the grass. Prolonged usage under even the best conditions can dull the blades. The integrity of the blades may also be at issue, as terrain or object strikes can deform or crack the blades. If the blades become unbalanced, the rotational forces can impart significant stresses to the drive system, accelerating wear on far more expensive components.
Necessary Equipment
With a few tools, removing the deck and blades will be a safe and swift affair. Much of the process can be handled by hand, but owners will still need tools for certain components. Owners should begin by acquiring a socket set and a set of screwdrivers. Many owners will already have such items on hand; owners who do not own such tools can find them at any local hardware store. Heavy gloves are also necessary for safe replacement of the blades; a towel can also come in handy, but is not mandatory.
To remove the blades, owners will also need a blade removal tool. This tool blocks the blades and prevents rotation while owners remove the retaining bolt from the central hub. Cub Cadet offers the Arnold Blade Removal Tool, which clamps to the outside of the deck and slides over the blades. This tool greatly simplifies the process and prevents owners from employing ineffective solutions, like jury-rigging a piece of wood, or potentially dangerous methods, like trying to hold the blades by hand.
The final component is a new set of blades. When replacing components on any mechanical device, owners should use only factory OEM parts. This is particularly important when replacing high stress components such as lawnmower blades. Original equipment is made to withstand the stresses of use within the expected operating parameters of the machine. Aftermarket parts may be built or designed improperly, resulting in reduced performance at best and a safety hazard at worst.
For those blades or any other components, visit CubParts.com. CubParts.com carries a full line of original equipment replacement parts for any Cub Cadet outdoor power equipment of any size powered by any engine. The site offers visitors a convenient parts lookup tool, which matches the right set of blades to the right machine. This ensures that owners order exactly the right equipment for their mower.
Safety Precautions
Before performing any work on a Cub Cadet riding mower, owners should take a few simple precautions. The first precaution is the maintenance environment. The mower should be placed in a clear space that is free of oil, obstructions, or other hazards. The space should be large enough to accommodate the mower and the deck separately, as owners must slide out the deck to remove it.
If the mower has been in use recently, remove the key and allow the engine to cool before proceeding any further. Remove the spark plug wire and disconnect the battery terminals to prevent accidental ignition while working on the mower. The deck will be disconnected by the time the blades are accessed, but owners must still work near the PTO belt and pulley.
Step-by-Step Guide
The first step in accessing the blades is to remove the deck. Begin by setting the deck in its lowest position. Pull the J-hooks on both sides of the deck out and down to disengage the deck. Raise the deck to its highest position. Once the deck is in this position, remove the pin holding the stabilizer rod and pull the stabilizer out of the bracket. All of these steps can be done by hand.
Next, remove the belt keeper. This will require a screwdriver to remove the screws that fasten the keeper to the machine. Retain the screws. Slide the belt keeper out and down on the underside of the machine and remove it entirely. Next, remove the PTO belt from the PTO pulley. Pull off the bowtie clip to disconnect the PTO cable and remove the spring.
The deck is now ready for removal. Turn the wheels all the way to the left and slide it out to the right side of the mower. To access the blades, flip over the deck. Slide the blade removal tool over the blades and the side of the deck and clamp it down. Remove the retaining bolt on the central hub to release the blades. Carefully remove the blades and either dispose of them in a container at the spot or wrap them in a protective material such as an old towel. Replace the old blade with the new blades and fasten the bolt, securing it with the torque specifications provided in the owners’ manual. Check the new blades for any unusual wiggle or binding.
From there, perform the previous steps in reverse order. Remove the blade removal tool. Flip over the deck and slide it back under the machine. Reattach the PTO cable and spring. Secure the PTO belt around the PTO pulley and replace the belt keeper. Place the stabilizer rod and J-hooks in their previous configuration.
For all blades, belts, and tools required to perform routine maintenance on a Cub Cadet Rider – or any other Cub Cadet outdoor power equipment, CubParts.com provides a wide range of OEM Parts – as well as professional service and technical knowledge. The online parts lookup tool allows the user to locate, order and ship parts easily.