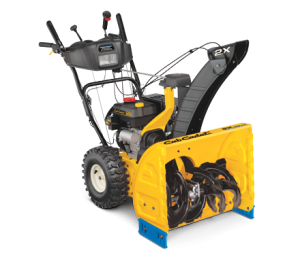
 The Cub Cadet 524 WE and SWE use a single belt to transfer power from the engine to the auger. These snow blowers have an auger control that pushes an idler pulley against the belt, increasing tension so that the belt will transfer power between the engine’s drive pulley attached to the engine and the output pulley attached to the auger. A belt that is broken or stretched will prevent this power transfer, and the auger won’t move. However, there are four other problems that could keep the auger from spinning:
– The auger control cable is too loose to engage the tension pulley.
– The chute is clogged, forcing snow to gather around the auger.
– An object is lodged in the auger.
– The sheer pins holding the auger have broken.
If these causes have been ruled out, changing the belt should fix the problem. Even if the belt hasn’t failed, it’s a good idea to inspect it at least once a season, replacing it if there are signs of cracking. Unlike the drive belt, the auger belt is easy to replace and doesn’t require any special tools.
Changing the Belt
1. During this repair, the snow blower will need to be flipped on its side, causing fuel to spill out of the tank around the cap. Allow the engine to run until the fuel tank is empty to keep this from happening.
2. The belt is covered by a plastic shroud between the engine and the auger. Facing the front of the snow blower, there is one screw on the left side next to the engine and one on the right side next to the auger. Remove these screws and the cover.
3. Remove the belt guide. This is a piece of wire bolted to a plate behind the top pulley. When reassembling, remember that the washers need to go between the guide and the bold heads.
4. Pull up on the belt and roll it off of the drive pulley.
5. Gently tilt the snow blower forward until it is resting on the auger guard, exposing the underside of the frame.
6. Unbolt the cover on the bottom of the frame. There are four screws: two below the top seam of the sheet metal and two below the middle seam.
7. On the lower left next to the auger pulley there is a shoulder bolt that acts as a belt keeper. Loosen the nut on this bolt and slide it upwards out of the bracket to remove it.
8. Roll the belt off of the auger pulley. Engaging the auger control will make this easier. The belt can then be pulled straight out from the housing.
9. Follow these steps in reverse to install the new belt. Check the tension spring next to the shoulder bolt and make sure it hasn’t come loose.
Now that the belt has been installed, the auger control will need to be tested and adjusted.
Adjusting the Auger Control
1. Put the control in the “up” position. The cable should have a little slack, but not be tight.
2. Refuel the snow blower and start it in a well ventilated area.
3. Engage the auger control for 10 seconds and then release. Repeat several times.
4. Disengage the auger control and set the throttle to Fast (rabbit symbol.) Walk around to the front of the snow blower and check to see if the auger is moving.
If the auger does not turn when the control is engaged, the cable needs to be tightened. If the auger is moving at all during step 4, the cable will need to be loosened.
5. Shut off the engine and wait until all moving parts have stopped.
6. Facing the controls, follow the auger control cable down to the adjustment bracket next to the left wheel. Loosen the top bolt. Slide the bracket up to loosen the cable or down to tighten it. Tighten the top bolt, and then follow steps 1-4 to recheck the tension.
Where do I get the belt?
Cubparts.com stocks parts for Cub Cadet products and has a convenient online search feature to find the correct belt for your 524 snow blower.
