
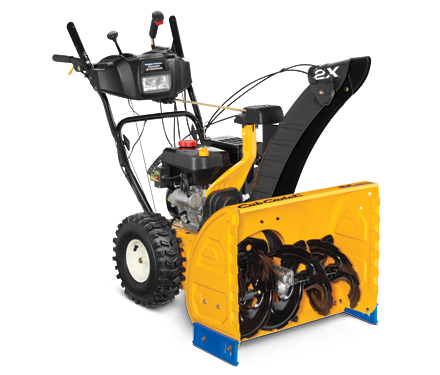
 Strong winter storms can develop at a moment’s notice, dropping significant snow accumulations that homeowners can only clear away with a Cub Cadet snow blower. For this reason, it’s a good idea to get started with snow blower assembly, adjustment and setup as quickly as possible. For those homeowners just getting started with Cub Cadet’s 526 SWE model, there are a few important things to know when getting the new equipment ready for its first job.
Proper Assembly and Setup Ensures Excellent Operational Safety
By design, Cub Cadet’s snow blowers are as safe as they are durable and powerful. Even so, the best Cub Cadet snow blower can cause serious safety issues if assembly and setup procedures aren’t performed properly. It is for this reason that equipment owners should always read through the instruction manual while preparing their equipment for use. Become familiar with the required setup and assembly steps, learn the vocabulary needed to operate the snow blower, and locate important levers that control its drive system, auger, and other key parts.
Snow Blower Assembly: What to Know in Advance
The Cub cadet 526 SWE snow blower is an advanced piece of equipment that makes the winter months easier to handle, but its assembly procedures are actually pretty basic. Even novice power equipment buyers can work through assembly rather quickly.
1. Assembling the Handle
The snow blower’s handle is pre-assembled, but it’s kept separate from the equipment during shipping. This actually makes assembly pretty easy, since the handle only needs to be inserted firmly into place at the rear of the snow blower. Start by unpacking the handle and removing any plastic, protective materials, and other packaging.
Next, place the shift lever into the “Forward-6” position and make sure both control cables are properly aligned with the handle’s roller guides. Insert the handle into the brackets that will hold it in place. Finally, lock the handle into place. The 526 SWE comes with two plastic knobs on either side of the handle. These knobs tighten an internal clamp that fastens the handle into place and prevents it from slipping during use.
2. Installing the Chute
The chute installation procedure is an extensive one, and it requires a large number of tools and OEM parts to be completed properly. For the safest and best assembly procedure, equipment owners should see the snow blower’s instruction manual. Complete with a step-by-step guide and helpful diagrams, this assembly guide is the best way to make sure that the chute is tightened securely and integrated fully with the directional control system.
3. Assembling the Chute Directional Control
If the snow blower uses a chute directional control on the operator panel, it can be installed in two simple steps during the assembly phase. Remove the flat washer, hairpin clip and plastic cap from the directional control. Next, insert the directional control into the lower bracket. Once in place, the directional control can be secured by using the washer and hairpin clip removed during the first step.
Equipment Set-Up Procedures
Now that the snow blower is fully assembled, a few key parts need to be inspected and setup prior to turning the engine on for the first time. Get started by following a few basic steps for each of the procedures listed below.
1. Shear Pins
Every new Cub Cadet 526 SWE snow blower comes with a pair of replacement shear pins that can be put into place if the standard shear pins become damaged during snow clearing. The company recommends storing these in a small compartment located on the operator control panel until they’re needed.
2. Chute Clean-Out Tool
A chute clean-out tool, used to clear snow and ice blockages, is bundled with the snow blower. This tool is fastened during shipment using a small clip. Simply cut this clip off and dispose of it properly.
3. Tire Pressure
During shipping, the snow blower’s tires are intentionally inflated beyond Cub Cadet’s recommended psi level. The tires must be deflated prior to use so that they do not suffer from excessive wear or burst during snow clearing.
Key Adjustments Before First Use
The final step before putting the equipment to use involves making a few small adjustments to key parts. Here is what to keep in mind when preparing the snow blower for its first snow-clearing task.
1. Skid Shoes
Skid shoes are adjusted upward when the equipment is shipped, but they will not perform well in this position when clearing snow. Adjust the skid shoes downward before clearing snow for the first time.
2. Auger Control
The auger control may not be properly adjusted after shipment and delivery. Follow the adjustment guide in the snow blower’s instruction manual to properly check and adjust the auger control before first use.
CubParts.com Has the Parts Equipment Owners Need
After initial snow blower assembly, the biggest concern facing equipment owners will be routine maintenance and occasional repairs. CubParts.com can help with both of these concerns via its online parts search tool. Equipment owners can search for parts by the engine’s manufacturer, the snow blower model, or a specific part number, making it easy to get the job done quickly throughout the winter.