
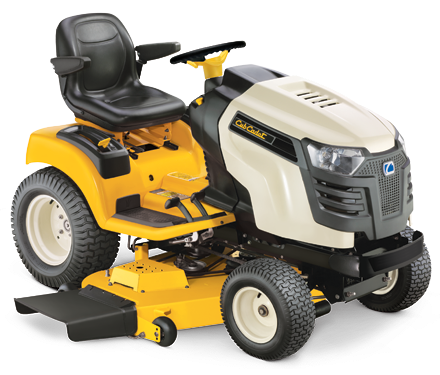
 Riding mowers are a great addition to the equipment lineup for homeowners that have larger areas to maintain and don’t want to take hours out of their weekends to use a more conventional push mower. Despite their overall convenience, these mowers can actually be pretty intimidating for those homeowners who are new to the equipment and aren’t sure how to turn it on, use it safely, and utilize all of the great features that make these mowers such an asset to outdoor maintenance and even lawn renovation. Those new to riding mowers, like the many models sold by Cub Cadet, might find it easier to use their equipment for the first time if they follow a step-by-step procedure when turning the equipment on and taking care of business outdoors.
A Step-By-Step Look at Getting Started with a Riding Mower
Whether it’s turning the equipment on, learning how to operate in reverse, or tackling regular maintenance needs, there are a few key steps that new equipment owners can follow in order to safely and effectively start using their equipment.
Step 1: Perform Out-of-the-Box Setup Routines to Get the Mower Ready
Lawn mowers ship mostly ready to use, but they do require at least a few basic steps in order to turn on and be safely operated around the home. First and foremost, operators should begin by connecting the mower’s spark plug and its battery cables. These two components are absolutely essential, since they allow for the riding mower to spark the fuel and get going.
That leads to the next two crucial steps: The mower’s fuel tank should be filled with unleaded gasoline, while its oil compartment should be filled to the “fill” line on the dipstick with Cub Cadet’s recommended type of engine oil. With these components in place, the mower will start appropriately and easily.
Step 2: Read the Operator’s Manual Before Beginning
The mower’s operator’s manual is a key piece of literature, and those new to riding mowers should read it in its entirety before starting the engine and getting acquainted with exciting new features. The manual serves as a maintenance, operation, and safety guide, and is the first point of reference for mower use and troubleshooting.
Step 3: Turn On the Mower and Get Moving
With the basics of setup and safety covered, it’s time for new riding mower owners to get down to business and start using the equipment as it was intended. It all starts by turning the ignition key into the “start” position until the mower starts, and then letting it rotate back to the “on” position. With the engine on and ready to go, equipment owners should get familiar with how to go forward.
To set the equipment in motion, set the throttle to the “rabbit” position and move the shift lever forward. Press the brake pedal until the parking brake is released, and use the gas pedal to propel the mower forward at an appropriate speed. For those who prefer a consistent speed, press the cruise control lever forward and hold it there until pressure is released from the forward drive pedal. The mower will now be in cruise control mode, freeing operators to work at a fast and consistent pace until the job is done.
Step 4: Get the Blades Spinning for Efficient Work
With the mower on and traveling forward in cruise control mode, it’s time to engage the blades so that the grass is easily trimmed to an appropriate length. To do this, make sure that the throttle lever is still in the “rabbit” position and then push the PTO lever forward until it’s in the “on” or “engaged” position. The mower’s blades will begin to spin, which should create an audible addition to the noise produced by the equipment as it continues to move forward.
Step 5: Perform Proper Maintenance Over Time
Don’t forget that a key part of mower ownership is keeping things in good shape throughout the year. That means inspecting the mower for rust, debris buildup, and damaged parts, before each use. It’s also important to follow the maintenance schedule included in the operator’s manual, since these maintenance intervals will lead to greater efficiency when mowing.
Look No Further than CubParts.com for OEM Parts
The typical homeowner has two distinct needs when it comes to lawn maintenance. The first of these is a new riding mower, and the second is easy availability of OEM replacement parts for use during regular maintenance or a crucial repair. CubParts.com can help with both of these requirements, thanks to a full lineup of popular, residential Cub Cadet riding mowers, as well as a wealth of OEM replacement parts. The website’s lookup tool even filters the available parts by their part number, the mower’s model number, or the type of engine found under the hood. It’s a great way to get started and keep going with a new riding mower.