
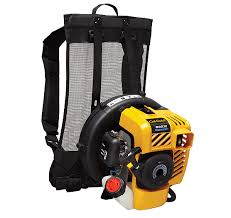
Cub Cadet may be phasing out their backpack blowers, but there’s still a lot to like about the BB 230. Here’s what you need to know to set up one of these machines out of the box and get the best use out of it.
Assembly
To assemble this blower, you’ll need a T-20 Torx screwdriver.
Place a hose clamp over one end of the flex tube, then slide the tube over the elbow pipe on the blower. Tighten the clamp.
Slide a hose clamp over the opposite end of the flex tube, then slide the flex tube over the tube with the throttle control. Tighten the clamp.
Slide the throttle control tube over the lower blower tube. Twist the lower tube to the right until it clicks into place. Slide the nozzle over the lower blower tube. Turn the nozzle to the right until it clicks into place.
Loosen the two screws on the bottom of the throttle control. Put the blower on and move the control around until you find a comfortable hand position. Tighten the screws.
Fueling
Cub Cadet recommends using fuel within one month of purchase. Cub Cadet’s own two-stroke oil is recommended, but if it isn’t available, the fuel should be blended with two-stroke oil and a fuel stabilizer.
The engine in this blower needs gas mixed with 2 stroke oil at a ratio of 50:1. That’s equivalent to 2.6 oz. of oil for every gallon of gasoline. Mix the gas and oil in a separate container before adding it to the blower’s fuel tank. If you aren’t using Cub Cadet oil, add 0.8 oz (23 ml) of fuel stabilizer per gallon of gasoline. Always add fuel with the engine off and the blower sitting on a flat, level surface.
Starting
Before starting, check the muffler, air intake, and filter for blockages or debris buildup. This buildup can cause performance problems and may catch fire as the engine warms up.
Press the primer bulb, located just to the left of the starter handle, until fuel is visible inside the bulb. This should take around 10 presses.
Close the choke by moving the choke lever, located above the priming bulb, to the fully closed position.
Turn the cruise control lever on the throttle all the way clockwise to the Fast position.
Crouch next to the blower and hold the top with one hand. With your other hand, pull the starter handle 5 times.
Move the choke lever to the middle position. Pull the starter handle another three to 5 times. If you’re using a drill with the Power Start bit, push the bit onto the bolt at the back of the blower and run the drill in two-second intervals. The engine should start.
If the engine doesn’t want to start, repeat the process, starting with priming the carburetor. After this attempt, if the engine still won’t start, move the choke lever all the way to the right and pull the starter handle or use the Power Start bit until the engine starts.
Once the engine is running, let it warm up for 30 seconds to a minute, then move the choke lever all the way to the right. Let the engine warm up another minute. The blower is now ready to use.
Tips for Using this Blower
The BB 230 is rated at 73dB, which is quiet for a leaf blower but isn’t quiet by any other standard. Even if you don’t have local noise ordinances, it’s a good idea to limit use to daytime hours so as not to annoy your neighbors. This equipment should also be used with hearing protection and a dust mask to protect yourself from noise and dirt particles.
Loosening packed leaves and debris with a rake or broom will make it easier to clean them up with the blower. Slightly dampening dry material will reduce dust.
The cruise control lever can be set for steady power with the throttle trigger being used for quick bursts of air when dislodging leaves. To keep the noise down, keep the throttle open just enough to get the job done.
The nozzle is designed to be used near the ground, skimming the surface of the soil to gently push leaves. Avoid blowing debris at people, animals, open doors and open windows.
Get the Parts You Need for Your Cub Cadet
Cubparts.com is an authorized Cub Cadet dealer, letting us carry the full line of OEM replacement parts and accessories for your equipment. We make finding the right part easy: just select your model and serial number, and our site will show you exploded parts diagrams and descriptions straight from the manufacturer for your equipment. No matter what you need, we can ship it to any address in the USA or Canada.