
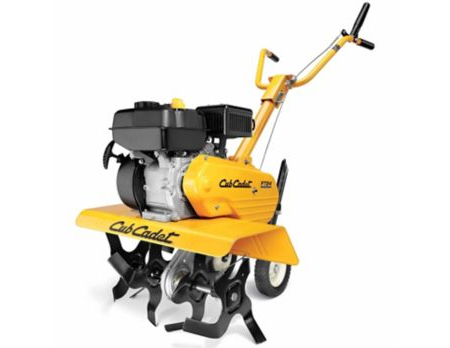
Cub Cadet’s tillers are easy to use, but knowing how and when to use them can be downright confusing. Do you really need to dig deep into the soil to get good results? What if you’re tilling ground you’ve planted previously? When is the best time to till? How do you keep your tiller from getting stuck? Here’s what you need to know to get the best results when establishing or reviving a garden plot.
When Should I Till?
The soil should be dry enough that if you pick up a handful and squeeze it, the dirt crumbles. If it forms a ball, it’s too wet. You can also test the soil moisture by pushing down a trowel in an area with unturned soil. If it’s difficult to dig in, the soil is ready to plow.
The soil temperature should be at or above 60ºF. If you don’t have a thermometer handy, you can test the temperature by sticking a finger a few inches into the soil. When the soil is warm enough, you should be able to keep your finger in the soil for a full minute.
If you plan on planting cool weather crops, the ground won’t be warm or dry enough to till when you’re ready to plant. Instead, till in the fall. Placing a layer of cardboard and mulch over the area will prevent weed growth and ready the soil for planting. This same method also works for getting a head start on next season’s bed preparation.
How Deep Should I Till?
For most areas, the tiller needs to dig into the top 6-10 inches of soil when creating a new seedbed. If the ground has been tilled before, the top two to three inches should be tilled to remove weeds and re-establish the plot. When applying fertilizer, limit the tines to the top 6 inches of soil.
In areas with heavy clay soil, it can be helpful to establish the plot with double digging. This improves drainage, although claims about root penetration are questionable. When done by hand, the top level of soil is dug up, then the second layer below it is turned and mixed. This results in a total depth of around 24 inches, or double the standard shovel depth. While your tiller won’t be able to reach that depth, there’s no reason to do everything by hand. Simply till the soil at your tiller’s maximum depth, then finish using a shovel.
How Do I Get the Right Bed Depth?
The depth bar should be lowered to a point that the handles are pointed slightly downward while tilling. If the tiller is moving forward too quickly, push down the handles, digging the depth bar into the soil. When the tiller doesn’t want to move forward, let up on the handlebars and shake them side to side to dislodge the tines. Raise the depth bar if the tiller still doesn’t want to move.
Tips for Getting Better Results
Water the soil a few days prior to tilling to make it softer, but don’t make it so wet that it won’t pass the moisture test. This will make it easier for the tines to dig in.
If you’re busting sod or turning soil that hasn’t moved in a long time, start with a depth of one to two inches for the first pass, then go another one to two inches deeper with every succeeding pass. Let the ground rest for a couple days before making a final deep pass.
Let the machine pull itself along. It should only take light pressure on the handles to keep the tines digging in.
To avoid compaction, walk on the untilled side and make only one pass at a time. Soil that has already been chopped up will compress when making contact with your feet or the tiller’s tines.
Keeping the tiller running at top speed will get the best results on hard soil while slowing down the engine will get better results when digging through loose, shallow or chunky soil.
Where Can I Get Parts for My Tiller?
If you need to do some maintenance to get your Cub Cadet tiller ready for spring, visit www.cubparts.com. As a certified Cub Cadet dealer, we’re able to offer replacement parts and accessories for all of their models past and present. Finding what you need is easy: select your model and serial number, and our site can show you diagrams and descriptions for each system on your equipment. We ship across the U.S. and Canada.