
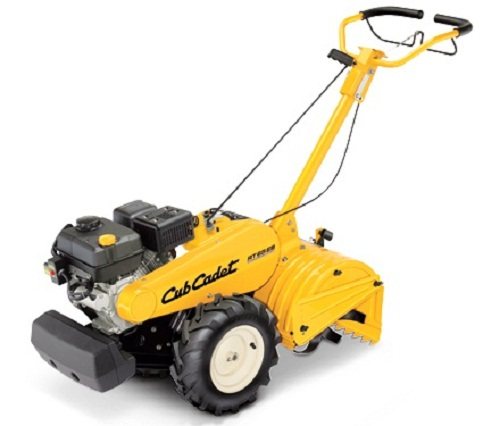
 As the weather warms up and homeowners get ready to turn brown lawns into robust areas for outdoor recreation and gardening, getting equipment prepared is absolutely essential. For those who own a garden tiller, there are a few key maintenance procedures that will ensure the equipment runs at peak efficiency, avoids common maintenance headaches and pitfalls, and has all of the replacement parts needed in advance so that tilling and growing can begin as soon as the weather permits. Before getting started with the tiller, be sure to go through the maintenance steps listed here.
Safety Comes First: What to Keep in Mind During Seasonal Maintenance
Maintenance work requires the same commitment to safety that regular tilling would require, and that means operators should perform such activities only after the spark plug has been disconnected and the tiller has been moved to a well-ventilated area. Flat, level surfaces should be used during maintenance. For added safety, pets and bystanders should be cleared from the area where maintenance is occurring. If the equipment was turned on recently at all, it should be allowed to cool down prior to maintenance to avoid burns and sparks that could potentially ignite a serious fire.
Key Maintenance and Adjustments for the Tiller
Most homeowners do conduct quite a few maintenance procedures prior to storing the tiller at the end of the summer season, but removing the equipment from storage will require a few added steps to ensure that the equipment is ready to work efficiently throughout the spring and summer months.
Start with Equipment Lubrication and Engine Oil
The key to a long-lasting, efficient piece of equipment is the lubrication present around all of its moving parts. Cub Cadet generally recommends these parts to be checked and lubricated at least once a season, and it’s a good idea to perform this check at the start of each season to guard against unwanted maintenance problems. Here’s what to check and lubricate:
– Transmission
– Clutch handle
– Pivot points
– Wheel shafts
– Tine Shafts
All lubrication should be done with a mild grease lubricant, liberally applied to guard against both friction and corrosion. When these parts have been lubricated, equipment owners should move on to the engine oil. All oil should be drained from the equipment and new oil should be filled to the line indicated on the dipstick. Make sure to use only the oil type recommended in the tiller’s instruction manual.
Check the Tines for Cleanliness, Sharpness, and Potential Damage
Tines can become excessively worn after a season of breaking up the soil, and they often require a thorough inspection at the start of each new growing season. When giving the tines an inspection, focus on three key concerns that are most likely to impact tiller performance:
– Look specifically at the sharpness of the tines. If they’ve become very dull, consider replacing them with OEM Cub Cadet parts that will allow for easier tilling throughout the year.
– If the tines are sufficiently sharp, ensure next that they have not become damaged, dinged or warped during last year’s tilling. Tines showing any signs of damage should be replaced with OEM replacements manufactured by Cub Cadet.
– Tines that are sufficiently sharp and free of damage should be cleaned using a damp cloth and mild detergent. This will remove all dust and debris, and it will help the times resist corrosion and other forms of damage over the next several months.
Perform Some Basic Adjustments for Performance and Comfort
Tillers can be adjusted in several key ways to ensure easier operation, better operator comfort, and more efficient work. Prior to getting started each spring, consider the following adjustments for better use all season long:
– Handle Adjustment
The tiller’s handle can be adjusted up or down based on the operator’s height and individual preference. Adjust before the first use and give the handle a quick check each time the tiller is used.
– Belt Tension Adjustment
As belts wear down, they tend to stretch slightly. Sometimes, this actually causes the belt to come loose from the pulleys and cause a significant maintenance headache. Inspect the belt, adjust its tension to be a bit tighter if needed, and enjoy greater peace of mind.
– Idler Pulley Rod
The idler pulley rod will need to be slightly adjusted if the drive belt was made tighter during the adjustment mentioned earlier. This will require removal of the spark plug, belt cover, and the cotter pin that holds the pulley rod in place.
Visit CubParts.com to Find a Wide Array of OEM Replacement Parts
Getting a tiller ready for springtime often means that homeowners will need at least one replacement part. CubParts.com makes the search for OEM replacements a bit easier with its online search tool, which can break parts down by tiller model, tiller engine type, and Cub Cadet part number.