
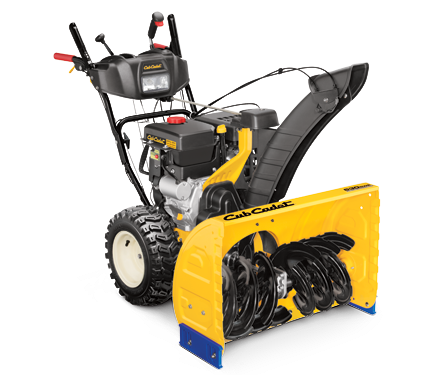
 The Cub Cadet 3X is a “three-stage” snow blower designed to handle the toughest winter storms and the deepest snow accumulations throughout the season. This powerful snow blower can handle challenges like tall snow drifts and heavier, wetter snow, but it must be properly assembled in order to do so. Unlike most snow blowers on the market, Cub Cadet’s 3X series comes with two distinct chute options that will require a slightly different assembly procedure.
How to Assemble Snow Blowers with Four-Way Chute Control
The Cub Cadet 3X snow blower is most often sold with a four-way chute directional control. This type of chute requires a unique assembly procedure for the directional handle and the chute itself.
Step 1: Start by moving the shift lever to the Forward-6 position. Next, cut the ties holding the chute control rod in place and make sure both chute control cables are properly aligned with the control rods. Finally, secure the handle by tightening the plastic knobs located on both the left and right side of the handle assembly. Before continuing, make sure that all ties and rubber bands have been removed from the handle assembly.
Step 2: Prepare the chute assembly by removing the pre-installed wing nut, hex screw, and hairpin clip from the control head. Also remove the bow tie pin from the support bracket. Next, insert the chute control rod into the chute control head.
Step 3: Place the entire chute assembly on the chute base. Keep the control rod positioned under the handle panel and secure the chute assembly with the hex bolt that was removed previously.
Step 4: Squeeze the directional control joystick and rotate the chute assembly until it faces forward. Move the chute into the “one o’clock” position until the silver indicator arrow just below the snow blower’s control panel is silver.
Step 5: Insert the chute control rod and push it forward until it’s secure. Use the hairpin clip to keep it in place. Use the remaining hardware to secure the chute, and then check the control cables for proper length and alignment.
How to Assemble Models with Overhead Chute Control
Loosen the handle’s lock nuts that keep the upper and lower parts of the handle in place. Next, follow the handle assembly steps for the 3X snow blower with four-way directional control. With the handle in place, the overhead control assembly can be put into place.
Step 1: Place the chute assembly on the chute base, securing it with the included chute lock nuts. Remove the hairpin clip from the chute control assembly area on the rear side of the chute.
Step 2: Insert the flex shaft into the chute until it lines up with the overhead chute control rod. Remove the hardware securing the ferrule at the end of the shift rod, and then insert the ferrule into the top notch of the shift lever. Use the hardware removed previously to secure the ferrule into place. Check control cables for proper tension and alignment before finishing assembly.
General Setup and Assembly Instructions for the 3X Series
With the handle and chute installed, the snow blower is closer to being ready for regular use. Even so, there are a few more tasks that must be completed before clearing snow for the first time.
1. Shear Pins
Every 3X snow blower comes with replacement shear pins. These pins can be stored in a small compartment in the dash panel until they’re needed later in the season.
The chute clean-out tool is initially fastened with both a built-in clip and a cable tie. Cut the cable tie prior to the snow blower’s first use.
3. Drift Cutters
Drift cutters initially point inward, making the snow blower easier to ship from the factory. Before using the snow blower, remove the four flange nuts keeping each drift cutter in place. Point the drift cutter attachments outward and then use those same flange nuts to secure them in the new position.
4. Adjustments
Tire pressure and skid shoes should both be checked and adjusted prior to equipment use. Make sure that tire pressure levels fall within Cub Cadet’s recommended range for this model, and check that the skid shoes are properly aligned for effective snow clearing.
5. Auger Control
Before clearing snow, make sure to check that the auger control cable has the proper amount of tension. The cable should not be tight when it’s engaged, but it should still have a very small amount of slack.
Find the Right Parts for Setup and Maintenance at CubParts.com
Once the brand new snow blower is properly assembled and adjusted, it can be used to clear deep snowfall throughout the winter season. As the equipment ages, it will require OEM replacement parts so that it can keep operating effectively and efficiently. CubParts.com is the best source for these parts, with an extensive selection of OEM replacements and a search tool that makes it easy to narrow those parts by part number, model number, and engine type.