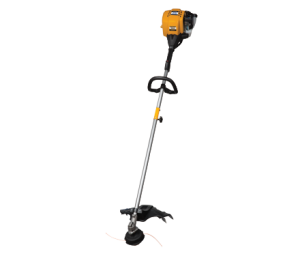
Having trouble getting new line onto the head of your Cub Cadet string trimmer? Want to swap out the bump head for a blade to do some brush cutting? Here’s everything you need to know to get your trimmer cutting the way you want.
Replacing the Line in Your Bump Head
Check your owner’s manual for the correct line size; most models are designed to use 0.095-inch trimmer line. The head is designed to hold 10 feet of twin strand line or two 10 foot sections of standard line.
1. Unscrew the bump knob. Remove the reel and spring. Set the spring aside.
2. Find the two holes on top of the inner reel. Insert one end of each section of trimmer line into each hole. Pull the lines through until all but two or three inches of line are left on the outside of the hole. Make sure the lines sticking out of the holes are the same length. Slide the short ends of the lines into the opposite inner reel hole. Pull the long ends of the lines to close the loop.
3. Wind both pieces of trimmer line around the reel in the direction of the arrow on the reel’s side. Leave 6 inches of line unwound. Push this loose line into the slots marked with the line size, typically ‘0.95”’. This keeps the line from unwinding while you fit the reel into the head.
4. Put the spring back on the shaft. Feed the trimmer line into the eyelets on the head. Put the reel onto the shaft, lining up the holding slots with the eyelets. Hold the wheel down against the spring and screw on the bump knob.
5. Once everything is in place, pull on both ends of the trimmer line. This will pull them out of the holding slots so more line can be released as you use your trimmer.
Using the Coupler to Switch Attachments
Newer brushcutter models including the BC 280 and BC 490 use separate boom attachments to go between the string trimmer and blade heads.
To remove an attachment:
1. Set the trimmer on a flat surface.
2. Turn the knob on the boom counter-clockwise to loosen it.
3. Push in on the release button opposite of the knob and slide the attachment out of the boom.
4. Put the hanger cap on the end of the attachment.
To install an attachment:
1. Remove the hanger cap from the end of the attachment.
2. Loosen the knob on the boom by turning it counter-clockwise.
3. Align the release button on the attachment with the guide recess hole on the trimmer.
4. Push the attachment into the coupler. It’s in place when the button snaps into the recess hole.
5. Tighten the knob on the boom.
Switching Between Bump Head and Brushcutting Blade on Older Models
On older models, the cutting head screws onto the drive shaft at the end of the boom. This shaft is left-hand threaded. A J-shaped locking rod is needed to keep the shaft from moving when tightening or removing the shaft bolt.
To remove a blade or bump head:
1. Slide the locking rod into the slot on the left side of the cutting head.
2. Hold the rod in place by gripping it against the boom.
3. To remove the bump head, turn it clockwise off of the output shaft. To remove a cutting blade, loosen the nut by turning it clockwise.
To install a cutting blade:
1. Slide the locking rod into the slot on the front left of the cutting head. Hold the rod in place by gripping it against the boom.
2. Place the blade on the driveshaft followed by the blade retainer washer and nut. The cone on the washer should face away from the trimmer head.
3. Turn the nut counter-clockwise to tighten it. If you have a torque wrench, torque the bolt to 27-28 lb-ft. If you don’t, once the nut seats, turn it another ¼ to ½ turn counter-clockwise.
To install a bump head:
1. Slide the locking rod into the slot on the front left of the cutting head. Hold the rod in place by gripping it against the boom.
2. Place the blade retainer washer on the driveshaft with the cone facing away from the head. Turn the bump head counter-clockwise by hand until tight.
Get Everything You Need for Your Cub Cadet
Lost a spring or washer? Need to replace a beat up bump head or a worn blade? Cubparts.com carries OEM replacements for everything Cub Cadet from trimmers to commercial ZTRs. Our site has factory diagrams and descriptions for each model, making it easy to find compatible parts for your equipment. We ship across the U.S. and Canada.

