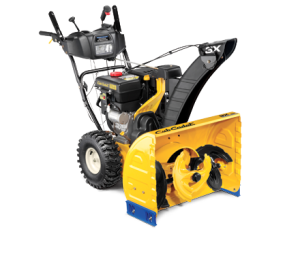
 One of the most common maintenance procedures required by the Cub Cadet 3X lineup of snowblowers is work that involves the replacement of the auger belt. In fact, this is the most common form of maintenance required by virtually every snowblower on the market. The reasons for this are numerous, but they mostly boil down to the amount of wear and tear placed on this belt during even short periods of clearing snow after a typical winter weather event.
A worn or damaged auger belt can often cause the snowblower to simply stop taking in snow in the first place, rendering the equipment largely useless until replacement is completed. With such serious implications, new equipment owners should quickly learn how to access, remove, and replace this belt so that their equipment can be repaired quickly if necessary throughout the winter.
Be Safe When Replacing the Snowblower’s Auger Belt
Snowblower maintenance isn’t just about getting things back into working condition. In fact, it’s also about staying safe and protecting the equipment from further damage while work takes place. In the case of the auger belt, that means waiting until the snowblower’s engine has cooled off and double-checking to make sure the equipment cannot accidentally start during replacement. It also means wearing protective gear and working on a flat surface so that the snowblower doesn’t accidentally tip over or cause other serious injuries.
Step-by-Step Instructions for Auger Belt Replacement
Removing the auger belt is a pretty easy task, but it does require a logical sequence of steps to be followed by equipment owners. Be sure to look over each of the steps below and perform them in order for the quickest and easiest replacement of this part.
Step 1: Get the Engine Ready
The engine should be permitted to run until all of the fuel in the fuel tank has been used up and the engine stops running on its own. Under no circumstances should fuel be left in the equipment during the auger belt replacement process. The snowblower also should not be tipped over with fuel left in the tank, as this can cause serious damage and risk operator injury.
Step 2: Remove the Belt Cover
The auger belt is contained beneath a plastic housing that Cub Cadet labels the “belt cover.” This housing is held in place by several self-tapping screws, each of which requires removal before the piece can be lifted off of the 3X snowblower. Go ahead and remove each of those self-tapping screws and set them aside, and then remove the plastic housing and set it aside as well.
Step 3: Remove the Auger Belt from the Engine Pulley
The engine pulley is the first place that the auger belt will actually be removed from. Slowly roll the belt off this pulley. Be patient, since slow removal is the key to reducing other forms of damage and minimizing the risk of operator injury.
Step 4: Remove the Plastic Frame Cover Underneath the 3X
The snowblower should be rotated up and over so that a plastic frame cover underneath the equipment becomes visible and accessible. When this cover has been made accessible, equipment owners will notice several self-tapping screws like those that held the plastic belt cover in place. Remove those screws so that the auger belt’s accessory pulleys are in view. Set the cover, and its self-tapping screws, aside so that they can be easily re-attached later.
Step 5: Remove the Shoulder Bolt
A small shoulder bolt is used underneath the equipment to act like something of a belt keeper within the 3X snowblower series. This bolt needs to be removed so that the auger belt itself can be more easily removed from the equipment without very much added effort. Go ahead and perform this removal before continuing.
Step 6: Remove the Belt from the Auger Pulley
The auger belt now must be removed from the last of the pulleys holding it in place, which in this case involves rolling the belt off the auger pulley. Again, perform this slowly and gently in order to reduce the potential for injury and equipment damage. With the belt fully removed, set it aside or dispose of it properly.
Step 7: Replace the Auger Belt
By following these directions in reverse, place the new auger belt onto the auger pulley, secure it using the shoulder bolt, and slip it back onto the engine pulley. Replace all of the plastic covers and plates that were removed to access each pulley before putting the equipment back into regular use.
For Parts and More, CubParts.com is an Excellent Resource
For a wide range of OEM Cub Cadet parts, CubParts.com is a natural destination for equipment owners. The site offers an online parts lookup tool as well as a full selection of instruction manuals, new equipment options, and other guides that can make a real difference during winter maintenance and snow clearing.
