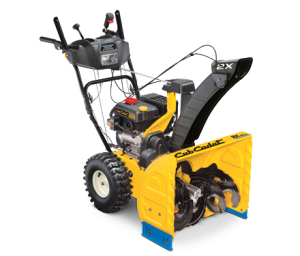
 Did you just get a new Cub Cadet 2X snowblower? Whether you got a 24”, 26” HP, 28” HP or the new 30” HP, this guide will take you through everything you need to do to get your new equipment ready to use.
Oil
The engine in this snowblower is shipped without oil in the crankcase. Check the engine manual for instructions on adding oil.
Unfolding the Handle
1. Push the shift lever into “Forward-6.”
2. Look at the back of the snowblower and make sure the cables are seated in the roller guides.
3. Tilt the handle up.
4. Tighten the knobs on the sides of the handle. Your snowblower may have been packed with some rubber bands around parts of the handle. These can now be removed.
Installing the Chute
1. Remove the hairpin clip, wing nut and screw from the chute control head, located behind the chute base. Set the control head aside.
2. Remove the clevis pin and cotter pin from the chute support bracket that was just uncovered by removing the control head.
3. Insert the chute control rod into the head. Line up the hole in the rod with one of the holes in the head, pushing the rod in as far as it will go.
4. Put the chute on top of the chute base. Place the control head back onto the support bracket and insert the screw through the base and head. Don’t tighten it down yet.
5. Squeeze the trigger on the direction joystick and move the chute by hand until it’s facing straight forward. The holes on the control rod should be facing straight up.
6. Rotate the joystick right to the one o’clock position. The pinion gear just below the front of the control panel has a small silver arrow. This arrow should now be facing upward.
7. Slide the control rod into the pinion gear. The hole on the end of the rod should line up with the arrow.
8. Slide the control rod toward the control panel until the hole on the end of the rod lines up with one of the holes in the control head. Insert the hairpin clip into the hole.
9. Reinstall the wing nut, clevis pin and cotter pin to attach the control head to the support bracket.
10. Make sure the cables running through the guide on the top of the engine are sitting to the left side of the control rod.
Spare Shear Pins
A pair of spare pins and cotter pins are included with this snowblower. There’s a space for these on the controls next to the left handle. Insert the shear pins and clip the cotter pins to them to keep them in place.
Chute Clean-Out Tool
This tool attaches to the clip on top of the auger housing.
Tire Pressure
The tires are overinflated for shipping. The correct pressure is printed on the sidewall of the tires. Both tires need to have the same pressure to roll evenly.
Skid Shoe Adjustment
These are shipped in their highest position. If you need to clear an uneven surface, lower the skid shoes to the middle or low position. To adjust the skid shoes, loosen the two nuts on the outside of the shoe, slide the shoe into position, and tighten the nuts.
Auger Control Adjustment
While this is a part of regular maintenance, the auger control needs to be checked before you first use your snowblower.
Checking the tension:
1. Start the engine.
2. Go to the operator’s position and start the auger.
3. Let the auger spin for about 10 seconds, then release the auger. Repeat this several times.
4. Set the throttle to “Fast.” Walk over to the front of the snow blower. If the auger is stopped and shows no sign of movement, the cable is adjusted correctly. If the auger does move, even slightly, go back to the operator’s position and shut the engine off immediately.
Adjusting Tension:
The control cable runs through the roller guide on the left side of the operator’s position. To adjust the control cable, loosen the top screw on the guide and slide the guide up for more slack or down for less slack. Tighten the screw and recheck the cable tension using the method above.
Get the Parts You Need to Keep Your Machine Running
Getting an extra belt and a set of shear pins now can save you from most snowblower mishaps, and if you need something more, we have that, too. As a certified dealer for Cub Cadet and their engine partners, www.cubparts.com is able to offer the full line of OEM parts for Cub Cadet equipment, and we can ship those parts to any address in the U.S. or Canada.
