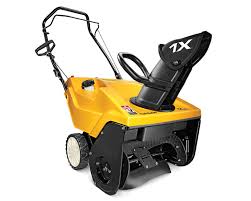
 Winter is coming, and that means snow. Whether you just bought a Cub Cadet 1X snowblower or you’re getting one out of storage, these tips will help you keep your machine performing at its best.
Assembly and Set-Up
1. Open the top of the box, then cut the corners of the front of the cardboard. Fold down this new flap.
2. Pull the snowblower out of the box. Remove any zip ties holding the control cables in place.
3. Add oil to the engine. Check the engine owner’s manual for instructions.
4. Remove the wing knobs and carriage bolts from the handle joints. Rotate the handle upward until the holes on the upper and lower handle line up. Reinstall the knobs and bolts.
5. Slide the chute handle into the slot in the middle of the chute. The tabs on the handle will click into place.
6. Remove the three screws in the chute base. Fit the chute onto the hole, lining up the holes on the chute and the base. Reinstall the screws.
7. Install the eye bolt and handle knob in the hole on the right side of the handle. Leave these parts loose, and line up the opening of the eye bolt with the back of the snowblower.
8. Pull the recoil starter up and pass the rope through the eye bolt. Tighten the eye bolt and knob.
Getting the Blower in Position for Repairs
All repairs to the drive system and auger require tilting the snowblower back for better access. Taking these steps will keep gas from leaking out of the fuel tank and oil from leaking into the combustion chamber while the 1X is in this position:
1. Empty the fuel tank by running the engine until it stalls.
2. Pull the starter handle until resistance is felt. Both the intake and exhaust valves will be closed, reducing the amount of oil that can leak into the cylinder.
3. Tilt the snowblower back until it’s resting on its handles.
Having trouble getting the engine to turn over after the repair? Remove the spark plug and pull the starter a few times. This will flush out any oil inside the cylinder.
Shave Plate
To check the position of the plate, set the snowblower on a level surface. The plate, wheels, and auger should all touch the ground. If the shave plate is brand new, it may lift the auger slightly off of the ground. The plate is too low if it wears out fast or the snowblower doesn’t propel itself. The plate is too high if snow passes under the snowblower.
1. Loosen the four lock nuts on the bottom side of the blade.
2. Slide the blade into the correct position.
3. Tighten the lock nuts, making sure the carriage bolts go into the square holes on the auger.
Control Cable
Over time, the cable and drive belt will stretch from wear, causing the auger to hesitate when the bail is engaged. If this happens, moving the end of the clutch cable from the lower hole to the upper hole on the bail.
Accessing the Engine
The engine is covered by a panel on the back side of the snowblower. This panel is held on by two screws in the panel’s bottom edge and one screw in the top center of the panel. Lift up on the bottom of the panel to disengage it from the tabs on the snowblower.
Replacing the Belt
1. Slide a board through the auger and the chute to keep the auger from turning.
2. Remove the four screws at the bottom edge of the belt cover. Remove the cover.
3. Remove the flange nut on the large auger pulley. Slide the auger pulley off of the shaft and work the belt off of the idler and drive pulleys.
4. Route the new belt around the pulleys. Slide the auger pulley onto the shaft and install the flange nut. If you’re having problems getting everything into position, close the bail to keep the drive pulley from spinning.
5. Reinstall the belt cover and remove the board.
Replacing Auger Paddles
1. Remove the washers and screws holding one of the old paddles onto the auger. Install the new paddle, matching up its position with the paddle on the other auger.
2. Repeat the process, replacing the other paddle and making sure it matches the position of the paddle you just installed.
Need Parts for Your Cub Cadet?
Cubparts.com makes finding parts for your snowblower easy: just select your model and serial number, and our site will show you parts information and diagrams specific to your machine. We’re a certified Cub Cadet dealer, which means we can ship the OEM parts and accessories you need to any address in the U.S. or Canada.
