
 Are you ready to face the snow this season with a new Cub Cadet snow thrower? Here’s what you need to know to get it up and running from assembling it straight out of the box to making adjustments for your local weather conditions.
Before You Begin
The engine is shipped without any oil. Do not attempt to start the snow thrower until oil has been added to the crankcase.
What’s in the Box?
A full inventory of parts can be found in the owner’s manual, but regardless of the model you have, you should expect to find the following when you open the box:
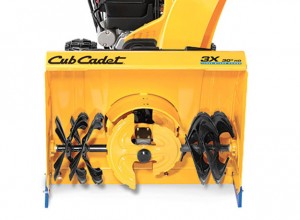
- The snow thrower
- The chute
- An extra pair of shear pins
- The owner’s manual for the snow thrower
- The owner’s manual for the engine
- A bottle of oil
Note that there will always be a separate engine manual, even if the engine was made by Cub Cadet, since there may be running changes to the motor while the snow thrower itself stays the same. The hardware needed to mount the chute should already be attached to the snow thrower.
Putting the Snow Thrower Together
Once everything is out of the box, remove the cable ties and rubber bands from the snow thrower. There should be ties or bands around the chute control lever, chute cleaning tool, and handle. Flip the end of the handle into position and tighten down the two wing knobs on the sides of the handle to fix it in place. On 1X models, the wing knobs and carriage bolts must be removed before the upper handle can slide into place, then refitted and tightened to attach the handle.
Check the cables. All models will have a throttle cable, and all models except the 1X 211 will have cables for the remote chute control. Make sure the throttle cable moves freely and that all the cables are free of kinks. On pull start models, the starter cable needs to run through an eyelet on the right side of the handle.
Depending on the model, the chute is fixed to the snow thrower via screws or a clevis pin and cotter pin. Make sure the remote chute control levers are centered, then attach the chute to the base with chute opening facing forward. On the 211, slide the chute handle into the slots in the middle of the chute. For all other models, remove the wingnut and bolt from the chute control assembly.
On 3X models, attach the assembly to the support bracket behind the chute and slide the chute control rod into the assembly and into the pinion gear below the joystick, lining up the hole on the shaft with the arrow on the gear. On 1X and 2X models, attach the assembly to the side of the chute.
Remove the filler cap/dipstick from the engine. Add the included oil and check the level by sliding the dipstick into the filler neck without screwing it in. The oil level should be between the low and high marks.
Setting Up the Snow Thrower
On 2X and 3X models, check the tire pressure. The owner’s manual will tell you the exact pressure range, but generally, the tires should usually be aired up to 15-20 psi.
Add fuel. It’s best to use fuel treated with a stabilizer because unpredictable weather can mean anything from days to months between uses. Treated fuel should be fresh for 90 days, while untreated fuel only lasts about 30 days.
On 2X and 3X models, the skid shoe height can be adjusted by loosening the two nuts on the side and sliding the shoes up or down. They should be mounted high when removing snow from a smooth paved surface and set to the middle or lowest position when removing snow from rough surfaces. 1X models don’t have adjustable shoes, but they do have an adjustable shave plate. It should be at the correct height from the factory.
Preparing with Parts and Accessories
Want to keep an extra pair of shear pins on hand so you can get running again after getting something stuck in the auger? Need to add a drift cutter kit to plow through tall snowfalls? You can get these things and more from cubparts.com. We’re a certified Cub Cadet dealer carrying the full line of OEM parts and accessories for your snow thrower. We have clearly labeled online factory parts diagrams to help you identify exactly what you need, and we ship across the U.S. and Canada.